ORIGINAL COURSE HANDBOOK · STUDIO 21.1.1 · OCTOBER 2026
Learn the craft. One deliberate step at a time.
68 original lessons, 17 sequential modules, and six portfolio projects. Read the explanation, perform the workflow in Resolve, then complete the exercise and knowledge check. Suggested practice times are learning windows, not video durations.
This independent course teaches practical workflows. It is not an official certification or an exhaustive control reference. Hardware and platform support vary. Some advanced assignments require your own suitable camera footage.
Get comfortable, set up your workspace, and make your first cut.
LESSON 01.01 · 20 MIN PRACTICE
Meet your creative workspace
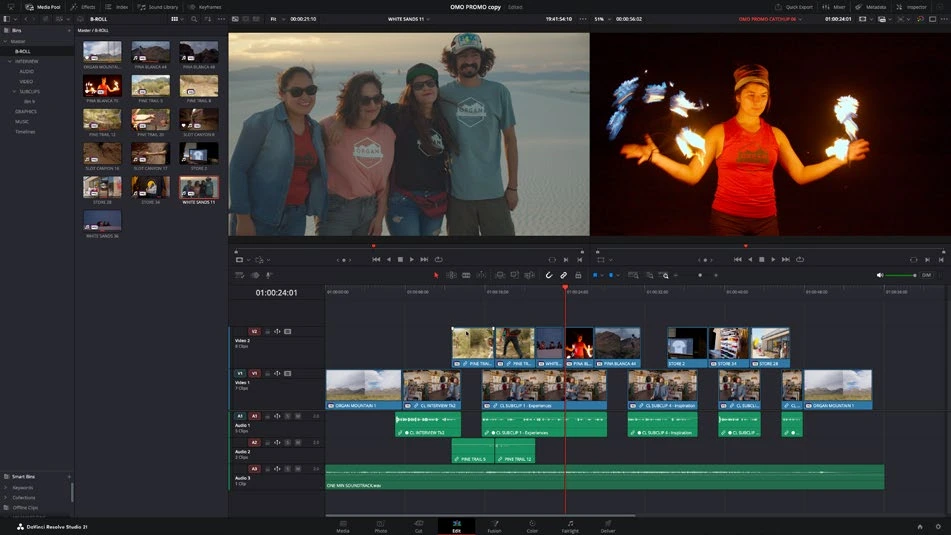
Resolve is a complete post-production environment. Its pages share one project: your edit, visual effects, grade, and sound mix stay connected. Learn the places before learning every button.
Learning outcome Identify the Media Pool, viewer, timeline, Inspector, and page bar without referring to the lesson.
Work through it
Open Resolve. In the Project Manager, choose New Project and name it First Film. Open it, then locate the page bar at the bottom of the window.
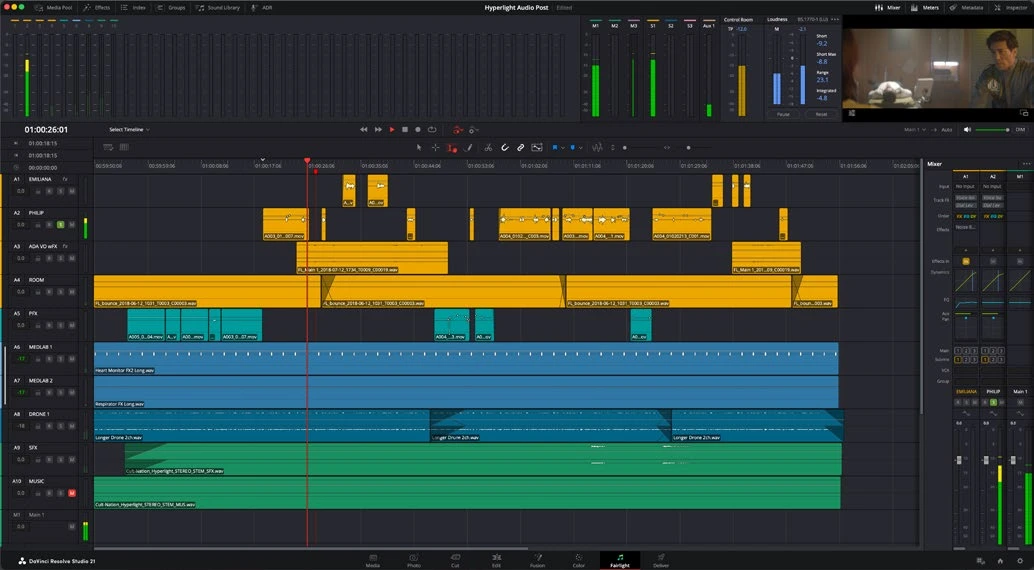
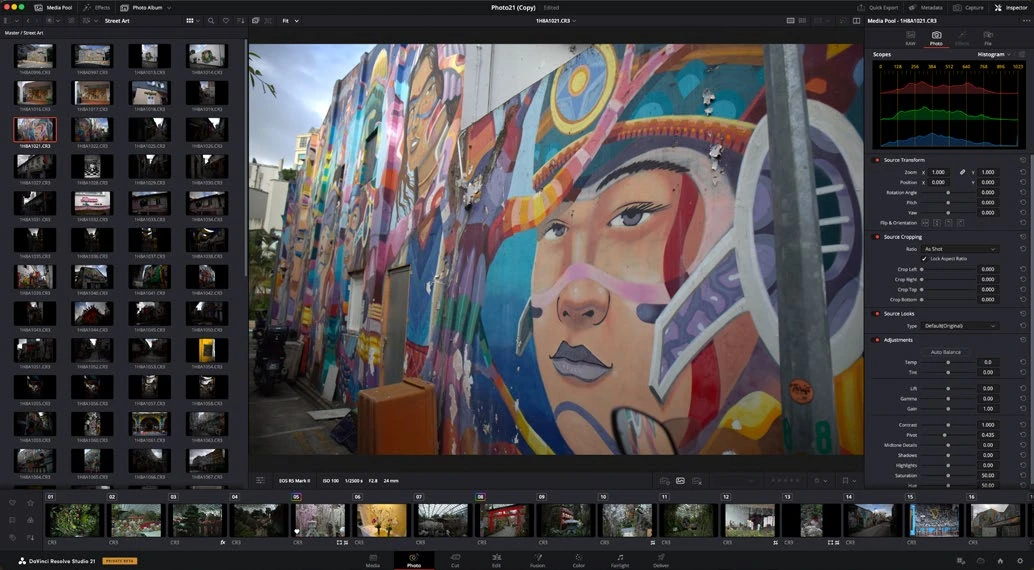
Visit Media, Cut, Edit, Fusion, Color, Fairlight, and Deliver. Resolve 21 also includes Photo for still-image work. Return to Edit for your first video project.
Identify the Media Pool for source clips, the viewer for playback, the timeline for arranging clips, and the Inspector for the selected clip’s controls. Toggle a panel to see how the workspace responds.
Import one short video using File > Import > Media. Double-click it to preview the source. Drag it into the empty timeline area, then press Space to play and stop.
Switching pages does not create a new project or require an export. A source clip and a timeline instance are also different: changing the timeline arrangement does not rewrite your camera file.
Your turn
Make a 10-second timeline from any clip you own. Find it on Edit and Color, then return to Edit. Explain which controls belong to the clip and which belong to the project.
Knowledge check
What happens when you move from Edit to Color?
Resolve exports the timeline automatically.
You must import the camera originals again.
You work on the same project using a different set of tools.
Check your answer
You work on the same project using a different set of tools.
LESSON 01.02 · 25 MIN PRACTICE
Install Studio and make a safe workspace
Studio is the paid edition of Resolve. Start with the correct installer, a supported system, and a recoverable practice project. A project file stores your edit decisions; it is not a copy of the media.
Learning outcome Create and restore a project backup and explain the difference between project data and media.
Work through it
Get the Studio installer from Blackmagic’s support center. Read its release notes for your operating system and GPU. Follow the supplied licensing process; do not assume installing the free edition enables Studio tools.
Create a course folder with Footage, Audio, Graphics, Exports, and Project Backups subfolders. Put a few clips you own in Footage and keep a second copy on a separate device.
In Preferences, review Media Storage and choose a writable drive with free space. Under User preferences, find Project Save and Load and enable project backups. Live Save and scheduled backups solve different problems.
Save the practice project, export a .drp from the Project Manager, then import that .drp with a different name. Confirm that its media is online. This is a recovery rehearsal, not just a backup promise.
A .drp does not normally contain your footage. Neither Live Save nor a backup on the same failing disk replaces an independent copy of originals.
Your turn
Write a two-line recovery plan: where your originals live, and how you would restore a project after a drive failure. Make one test restore.
Knowledge check
What does a typical .drp preserve?
Every original camera file automatically.
Only the final rendered movie.
Project decisions and structure, not the camera media itself.
Check your answer
Project decisions and structure, not the camera media itself.
LESSON 01.03 · 25 MIN PRACTICE
Resolution, frame rate, and project settings
Resolution describes frame dimensions. Frame rate describes the number of frames shown each second. Choose the intended delivery format before assembling a long edit; changing it late can cause avoidable work.
Learning outcome Set a timeline format deliberately and describe how source frame rate differs from timeline frame rate.
Work through it
Open Project Settings using the gear icon. For a simple practice project, select a 1920 × 1080 timeline and match its frame rate to your main footage or intended delivery. Record the choice.
Inspect source frame rate in the Media Pool. A 50 fps clip on a 25 fps timeline can play at normal speed or be deliberately slowed; those are different creative decisions.
When importing the first clip, read any prompt asking to match project settings. Accept only if the clip represents your intended timeline, not merely because the prompt appears.
Create a short timeline. Inspect Timeline Settings and notice the option to use or override project settings. Play motion in the viewer before committing a whole project to these choices.
For a first exercise, consistency matters more than chasing a cinematic number. A 24 fps timeline cannot recover motion blur that was not captured in the camera. Keep the client’s specification and your source material in view.
A mistake to avoid
23.976 and 24 are not interchangeable in every delivery pipeline. Do not reinterpret frame rate merely to make a warning disappear; verify sync and duration.
Your turn
Compare a normal-speed 50/60 fps clip with a deliberate half-speed version on an appropriate 25/30 fps timeline. Write down the timeline and source rates.
Knowledge check
Why choose timeline frame rate early?
It automatically raises the camera’s image quality.
It is the same setting as image resolution.
It shapes timing, playback, and delivery decisions.
Check your answer
It shapes timing, playback, and delivery decisions.
LESSON 01.04 · 35 MIN PRACTICE
Build and export your first small film
A first finished edit makes the rest of the course concrete. You will assemble three shots, adjust their length, add a simple title, and render a review copy.
Learning outcome Deliver a complete three-shot sequence that plays correctly outside Resolve.
Work through it
Import three clips. Open each in the source viewer and press I and O around a usable section. Add the selections to your timeline in an order that establishes a place, shows an action, and reveals a detail.
Use Selection mode to drag the ends of each clip. Keep roughly 3–5 seconds per shot. Play the whole sequence and remove any empty gaps you did not intend.
Open Effects on Edit and add a basic Text title above the opening shot. Change its text in the Inspector. Keep it inside the viewer’s title-safe guides and readable against the picture.
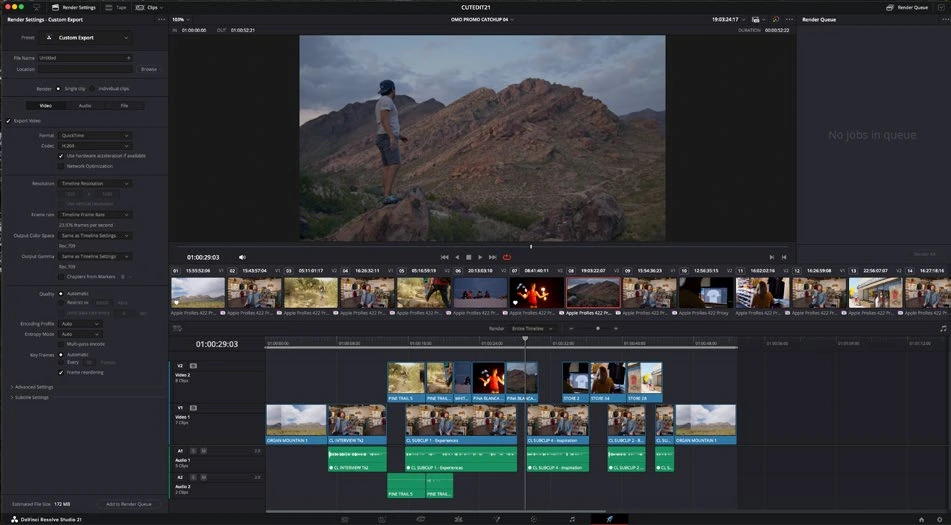
Open Deliver. Choose a supported H.264 review preset or Custom Export, confirm resolution, frame rate, audio, filename, and destination, then add the job to the render queue and render it.
Rendering successfully does not mean the film is correct. A wrong In/Out range, disabled audio export, or unintended black gap can survive a perfectly successful render.
Your turn
Watch the exported file in a separate player from start to finish. Check the first and last frames, the title, and whether audio is present. Keep this first version to compare with your later work.
Knowledge check
What is the final step after a successful render?
Assume the render queue guarantees quality.
Delete the original clips.
Watch and check the exported file itself.
Check your answer
Watch and check the exported file itself.
MODULE 02 · BEGINNER
Media, organized from the start
Build a reliable media library and keep every frame connected.
LESSON 02.01 · 25 MIN PRACTICE
Import, bins, metadata, and useful names
A bin is an organizational container inside the project. It does not move your source files on disk. Good organization lets you find an image by meaning instead of repeatedly opening every file.
Learning outcome Find clips quickly using bins, metadata, and a repeatable naming convention.
Work through it
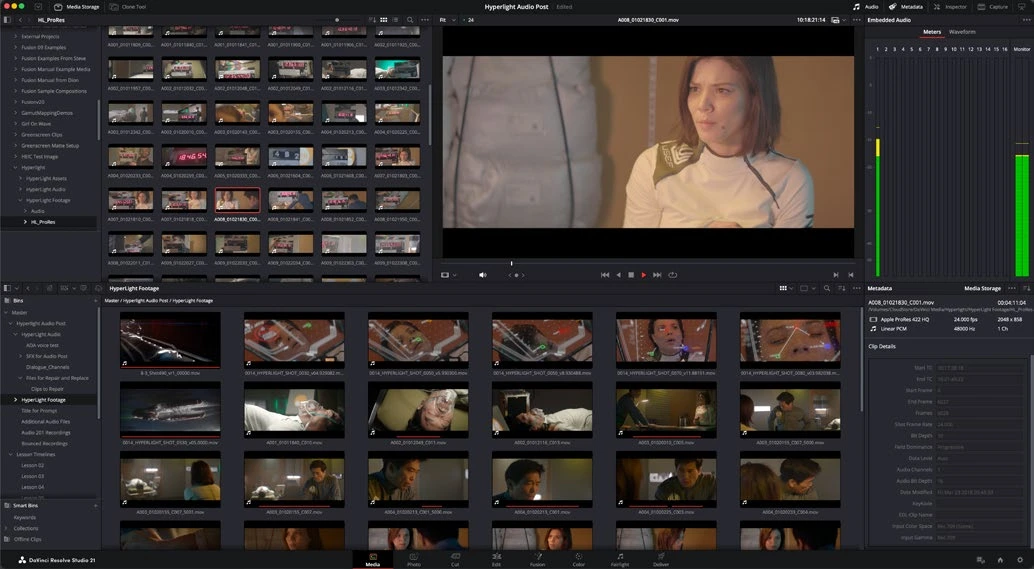
In the Media page, use Media Storage to find your course footage and bring it into the Media Pool. Check thumbnails and audio waveforms before moving on.
Create bins for Interviews, B-roll, Music, and Graphics. Put source clips in the appropriate bins. Keep camera filenames intact on disk so relinking and handoffs remain predictable.
Select a clip and inspect Metadata. Add a description, scene, or keywords where appropriate. Use consistent words: for example, exterior, dusk, wide, and city.
Switch between list and thumbnail views. Sort by duration or frame rate. Create a Smart Bin from a metadata condition and verify it includes only the clips you expect.
Renaming a bin does not rename or move the folder on disk. Changing disk paths after import can make media offline.
Your turn
Organize ten clips so you can find all exterior wide shots in under ten seconds. Add meaningful metadata to at least three clips and test your Smart Bin.
Knowledge check
What does moving a clip between bins change?
Its organization inside the project.
The codec of the source clip.
The physical location of the camera file.
Check your answer
Its organization inside the project.
LESSON 02.02 · 30 MIN PRACTICE
Sync sound and interpret audio channels
Production sound often lives in a separate recorder file. Sync aligns its timing to picture. Channel mapping determines which recorded signal appears on which timeline channel.
Learning outcome Validate synchronization and identify the correct source channels for dialogue.
Work through it
Import a camera clip and its matching recorder audio. Listen to both. Identify a slate clap, a clear transient, or reliable shared timecode that can serve as a sync reference.
Select matching sources in the Media Pool and use Auto Sync Audio with the appropriate timecode or waveform method. Preserve camera audio as an additional reference when the available option fits your workflow.
Open the synced source and inspect the beginning, middle, and end. A sync result that starts correctly can still drift if recording clocks or rate interpretation differ.
Review Clip Attributes > Audio for a multichannel recording. Map useful microphone channels correctly and avoid sending a silent or duplicate channel into your edit.
Waveform sync is not infallible, especially with low camera audio, music playback, or different takes. Always listen and inspect the result.
Your turn
Sync one interview clip and check lip movement against consonants at three points. Label the microphone tracks clearly. If you have only phone footage, practice mapping its existing stereo channels and describe what you hear.
Knowledge check
How do you verify an automatically synced clip?
Assume a successful command means there is no drift.
Check only the filename.
Check picture and sound at multiple points in the recording.
Check your answer
Check picture and sound at multiple points in the recording.
LESSON 02.03 · 25 MIN PRACTICE
Proxies, optimized media, and render cache
These tools solve different performance problems. Proxies are alternate source files. Optimized media is Resolve-managed source optimization. Render cache stores processed results to avoid recalculating expensive effects.
Learning outcome Choose the correct performance tool and verify which media is used for final output.
Work through it
Choose one demanding clip and observe playback before changing anything. Note dropped frames or stuttering so you have a baseline.
Choose a proxy format and location in project settings, then generate proxy media for the clip from the Media Pool. Pick a lightweight supported editing codec and resolution appropriate to your computer.
Use the proxy-handling options under Playback to compare camera originals with proxies. Confirm that switching does not change clip timing or framing.
For a clip with an expensive effect, enable an appropriate render-cache mode and wait for the cached section. Disable the effect or adjust it and observe how cache validity changes.
A proxy cannot repair missing detail or focus. Using low-quality intermediates for final output can bake their limitations into the export.
Your turn
Create a small comparison log: original playback, proxy playback, and cached effect playback. Before a test export, review whether Deliver is allowed to use proxy, optimized, or cached media.
Knowledge check
Which tool stores an already-processed effect result?
A bin keyword.
A timeline marker.
Render cache.
Check your answer
Render cache.
LESSON 02.04 · 35 MIN PRACTICE
Relink offline media and consolidate a project
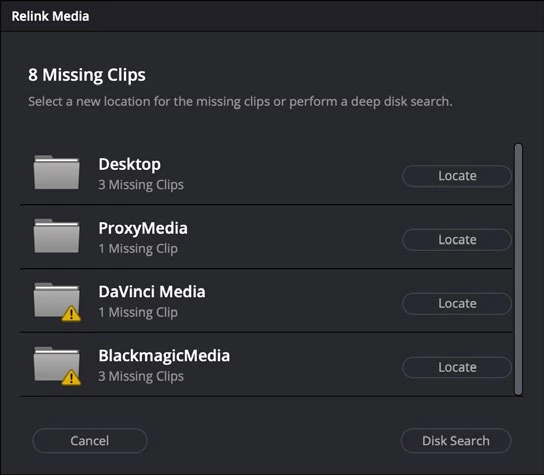
Media offline usually means Resolve cannot access the expected source path, or cannot decode the file. Diagnose the reason before rebuilding the edit.
Learning outcome Recover a deliberately broken path and validate a portable project copy.
Work through it
On a disposable copy of your practice project, close Resolve and move one copied media folder. Reopen the project and observe which clips become offline. Do not experiment on your only originals.
Select the affected clips or bin and use Relink Selected Clips. Point Resolve to the actual new media location and let it search. A drive letter or volume-name change may be the only difference.
Compare duration, timecode, audio, and frames at edit boundaries after relinking. Repeated camera filenames can connect the wrong shot if identity is not checked.
Explore Media Management for copying used media into a new destination. Choose Copy for a safe rehearsal. Include sufficient handles if you trim media, and test the result before discarding anything.
Moving or deleting source media during consolidation can damage other projects that reference it. Test Copy first, and verify any archive independently.
Your turn
Make a copied, consolidated version of a short project and reopen it with the original media location temporarily unavailable. Confirm that all used clips play.
Knowledge check
What should follow relinking?
Change the timeline frame rate.
Check that the relinked files are the correct takes and frames.
Delete every other version of the files.
Check your answer
Check that the relinked files are the correct takes and frames.
MODULE 03 · BEGINNER
The Cut page: find the story
Turn raw footage into a clear first assembly, quickly.
LESSON 03.01 · 25 MIN PRACTICE
Source Tape and a fast selects pass
The Cut page emphasizes quick navigation through footage. A selects pass is a collection of usable moments, not a finished story. Keeping those decisions separate reduces distraction.
Learning outcome Review a bin efficiently and assemble a useful selects sequence.
Work through it
Place related clips in a bin and open Cut. Try Source Tape to review the bin as a continuous source. Keep the bin scoped to a scene or shoot rather than an entire unrelated archive.
Use J, K, and L to shuttle. Mark useful In and Out points with I and O. Listen at normal speed before selecting speech so you do not miss its meaning.
Append useful ranges to a selects timeline. Prefer slightly generous boundaries so breaths and action remain available for later trims.
Use the overview timeline to navigate broadly and the detail timeline for local timing. Play the selects without adding effects or music.
Picking only visually impressive shots can leave you without coverage that explains the action. Select for story function as well as beauty.
Your turn
Build a 60–90 second selects reel from at least six clips. Add a short note for the purpose of each selection: setting, action, reaction, or detail.
Knowledge check
What is the main purpose of a selects pass?
Apply the same transition to every shot.
Collect usable moments before refining the final structure.
Create the final sound mix.
Check your answer
Collect usable moments before refining the final structure.
LESSON 03.02 · 25 MIN PRACTICE
Append, insert, overwrite, and placement
Different editing commands answer different questions. Append extends the sequence. Insert makes space. Overwrite replaces timeline material without necessarily shifting everything after it.
Learning outcome Predict how an editing operation will affect content and total duration.
Work through it
Create a timeline with three five-second clips. Duplicate it so you can compare results. Put the playhead inside the middle clip.
Load a two-second source selection. Use an insert operation and observe the timeline duration and the material that moves later. Undo it.
Use overwrite with the same selection and observe what is replaced. Undo again. Finally append the selection to the end and compare the result.
Try Cut’s context-sensitive placement tools, reading tooltips first. Confirm the target edit and track before accepting the result; the nearest-edit behavior can differ from a simple playhead insertion.
Tool names do not remove the need to inspect the timeline. Source range, target track, and placement mode all affect the result.
Your turn
Write down the total sequence duration after an insert, an overwrite, and an append. Explain why one operation can replace content while another preserves it.
Knowledge check
Which operation generally makes room for new material?
Changing a bin color.
Insert.
Overwrite.
Check your answer
Insert.
LESSON 03.03 · 25 MIN PRACTICE
Trim a sequence around movement
An edit feels natural when action, attention, and timing work together. The correct cut is not always at the end of the source clip; it is where the audience is ready to move.
Learning outcome Refine a cut by comparing action continuity and audience attention.
Work through it
Choose a wide shot and a closer shot of the same action. Place them consecutively and find the gesture or movement that connects them.
Trim the outgoing shot just before the action finishes. Trim the incoming shot so the movement continues without an obvious jump backward or forward.
Loop the edit and compare several positions a few frames apart. Watch at normal speed before judging in slow motion.
Check available handles at both sides. If there is no extra source footage, you may need a different take or a different transition rather than more trimming.
Zooming far into the timeline can make a technically precise cut feel too late at normal viewing speed. Repeatedly step back and watch the scene.
Your turn
Make three versions of one cut: early, on the action, and late. Describe how each changes pace and continuity. Keep the most convincing version.
Knowledge check
What are handles?
A setting that increases export resolution.
Only the visible waveform peaks.
Source frames outside the current timeline selection.
Check your answer
Source frames outside the current timeline selection.
LESSON 03.04 · 40 MIN PRACTICE
A rough cut with an intentional beginning and end
A rough cut establishes what the film says. It should be understandable before detailed grading, motion graphics, or sound polish. Structure is cheaper to change now.
Learning outcome Assemble a short sequence with a readable opening, development, and ending.
Work through it
Choose one simple story: arriving somewhere, preparing something, or completing a small action. Write the beginning, change, and end in one sentence each.
Arrange your selects to support those three beats. Remove duplicate information, even if the extra shot is attractive.
Watch without music once. Check whether the scene still makes sense and whether every cut gives the viewer something new.
Add markers where information is missing or pacing drags. Duplicate the timeline before a major restructuring so you can compare versions rather than relying on memory.
Music can hide weak structure temporarily. A sequence that only works because of a dramatic track may still need clearer images or dialogue.
Your turn
Create a 30-second rough cut with at least six shots. Show it to someone without explaining it first, or write a neutral description after taking a short break. Revise one unclear beat.
Knowledge check
What should a rough cut establish first?
The exact grain intensity.
The final delivery bitrate.
The story and its structure.
Check your answer
The story and its structure.
MODULE 04 · BEGINNER
Edit with precision
Control timing, layers, titles, and the details that make an edit flow.
LESSON 04.01 · 25 MIN PRACTICE
Track targeting, selection, and linked clips
A timeline contains tracks, clips, and edit points. What is selected and which tracks are targeted affect editing commands. Learn to predict the affected material before using a shortcut.
Learning outcome Predict which clips and tracks an operation will affect.
Work through it
Build a timeline with picture on V1 and camera sound on A1. Add a second video layer and a music track. Give tracks meaningful names.
Select a linked video/audio pair. Toggle Linked Selection and observe the selection behavior. Keep synchronization intact unless there is a deliberate reason to separate them.
Lock one track, perform a small move on another, then undo. Compare a lock with disabling track output: one protects edits, the other changes what is seen or heard.
Before an insert or ripple operation, inspect track selectors and automatic track-selection controls. Test on a duplicated timeline and watch what shifts.
Turning off a track’s output does not necessarily protect its clips from editing operations. Locking, targeting, and monitoring are different controls.
Your turn
Move a video clip and its sound together, then move only the picture while leaving sound in place. Undo the offset and explain how you verified sync.
Knowledge check
Why can a ripple edit shift unexpected clips?
Every track always ignores ripple edits.
The monitor brightness is too high.
Track selection and ripple participation influence the operation.
Check your answer
Track selection and ripple participation influence the operation.
LESSON 04.02 · 35 MIN PRACTICE
Ripple, roll, slip, and slide
Trimming is the grammar of timing. Ripple changes duration and shifts later material. Roll moves a shared boundary. Slip changes the source window inside a clip. Slide moves a clip while trimming its neighbors.
Learning outcome Choose the trim operation that matches the desired timing change.
Work through it
Arrange three clips with unused handles and duplicate the timeline. Enter Trim Edit mode and hover near edges until the cursor indicates the intended trim.
Ripple the end of the first clip by a second. Note the new total duration and the movement of later material. Undo.
Roll the boundary between two clips. The outgoing clip gains what the incoming clip loses, preserving their combined duration. Compare the viewer’s outgoing and incoming frames.
Slip the middle clip to choose different source frames without moving it in time. Then try a slide operation and inspect both neighbors. Undo between demonstrations.
Trim availability depends on source handles and neighboring content. If a trim stops, check whether you have reached the media boundary rather than forcing a workaround.
Your turn
Make one deliberate example of each trim. Record which changes timeline duration, which changes source content, and which changes a clip’s position.
Knowledge check
Which operation changes source frames while preserving clip position and duration?
Append.
Ripple.
Slip.
Check your answer
Slip.
LESSON 04.03 · 25 MIN PRACTICE
J-cuts, L-cuts, and invisible transitions
Sound and picture do not have to change together. A J-cut introduces incoming audio before its image. An L-cut allows outgoing sound to continue over the next image.
Learning outcome Use separate sound and picture edit points to guide attention.
Work through it
Place two dialogue or location clips in sequence. Listen for a natural phrase boundary and make an initial picture cut.
Temporarily select audio independently and extend the incoming sound earlier for a J-cut. Preserve useful room tone under the overlap.
For an L-cut, hold outgoing dialogue while cutting to a reaction or relevant B-roll. Check that the listener understands who is speaking.
Add short audio fades only where needed to avoid clicks. Compare the edit with and without a visual dissolve; a clean cut often communicates more clearly.
A dissolve needs handles from both clips. A transition cannot invent clean action outside the recorded source, and a long audio crossfade can overlap words unintentionally.
Your turn
Build a 15-second scene with one J-cut and one L-cut. Listen with your eyes closed, then watch without sound. Both passes should feel intentional.
Knowledge check
What defines a J-cut?
Every track ends at the same frame.
The incoming audio begins before its corresponding picture.
The outgoing picture always freezes.
Check your answer
The incoming audio begins before its corresponding picture.
LESSON 04.04 · 35 MIN PRACTICE
Titles, transforms, keyframes, and easing
Keyframes store parameter values at specific times. Resolve interpolates between them. A useful animation draws attention to content while maintaining readability.
Learning outcome Create a readable title with an intentional, controlled animation.
Work through it
Add a basic title to V2 over a shot. Use the Inspector to set a clear typeface, readable size, and restrained placement within safe areas.
Select the title or clip and move the playhead to its start. Enable a keyframe for a transform parameter, such as Position. Move later in time and change that parameter to create a second keyframe.
Open the available keyframe or curve controls. Compare linear motion with eased motion. Watch the complete entrance at normal speed and reduce movement if it competes with the footage.
Check the title over the brightest and darkest frames. Add restrained background separation if needed, then preview a phone-sized version of the output.
Animating too many properties at once makes the message harder to read. A technically smooth title can still fail if the text is too small or disappears too quickly.
Your turn
Create a lower third with a name and role. Keep it readable for at least three seconds, with a short eased entrance and no overlap with important faces.
Knowledge check
What does a keyframe store?
A parameter value at a particular time.
A permanent increase in resolution.
An entire new source video.
Check your answer
A parameter value at a particular time.
MODULE 05 · INTERMEDIATE
Advanced editorial workflows
Shape complex sequences with multicam, retiming, subtitles, and a clean conform.
LESSON 05.01 · 40 MIN PRACTICE
Multicam: synchronize, switch, and refine
A multicam clip groups synchronized camera angles into one editorial source. Synchronization comes first; choosing the best angle comes second. A polished multicam edit is still a storytelling decision.
Learning outcome Build, validate, and refine a multicam edit while keeping coherent sound.
Work through it
Import two or more angles of the same event. Assign clear camera or angle metadata. Check whether reliable timecode or usable scratch audio exists on every angle.
Select the sources and create a multicam clip using an appropriate sync method. Open its underlying timeline and check matching actions near the beginning and end.
Place the multicam clip on an edit timeline and open the multicam viewer. Play in real time and switch picture angles at meaningful moments. Decide whether audio should stay on the main recording or follow camera switches.
Refine the resulting cuts with normal trim tools. Check reaction shots, continuity, and any switches during blinks or camera movement. Preserve the multicam structure until revisions are complete.
An angle with the best picture may have the worst sound. Switching audio with every picture cut can create jarring changes in noise and perspective.
Your turn
Cut a 30-second two-angle interview or performance. Keep one consistent audio source and make at least three motivated camera changes.
Knowledge check
What should you verify before cutting multicam?
That every angle has the same filename.
That music is already at maximum level.
That the angles remain synchronized across the recording.
Check your answer
That the angles remain synchronized across the recording.
LESSON 05.02 · 40 MIN PRACTICE
Speed changes, freeze frames, and optical flow
Retiming changes how source time maps to timeline time. Simple frame sampling, frame blending, and optical-flow interpolation produce different artifacts. The right method depends on movement and available frames.
Learning outcome Choose a retiming method by inspecting motion artifacts in a rendered result.
Work through it
Duplicate a short shot and use Change Clip Speed or Retime Controls to create a constant-speed slow version. Check its duration and how the change affects adjacent clips.
Add speed points to build a ramp. Open retime curves and adjust the speed transition so acceleration supports the action rather than feeling accidental.
Compare the available retime-process settings on a difficult section. Inspect occlusion edges, crossing limbs, water, and fast pans, where invented frames may fail.
Create a brief freeze frame deliberately and add enough context before and after it. Render a short test; real-time preview can skip frames and hide interpolation defects.
Optical flow is an estimate, not a reconstruction of reality. Faster processing or a more advanced Studio mode does not guarantee clean motion around overlapping objects.
Your turn
Create a slow section, a speed ramp, and a freeze using one clip. Export each and identify the cleanest method for the source material.
Knowledge check
Why inspect a rendered optical-flow result?
Interpolation can create visible warping around difficult motion.
It always restores the exact missing camera frames.
The timeline frame rate becomes irrelevant.
Check your answer
Interpolation can create visible warping around difficult motion.
LESSON 05.03 · 35 MIN PRACTICE
Subtitles, readability, and accessible delivery
Subtitles carry language and timing, not just decoration. Their accuracy matters more than animation. A readable subtitle should remain on screen long enough to understand and should not compete with faces or important graphics.
Learning outcome Create and check accurate subtitles in the correct delivery form.
Work through it
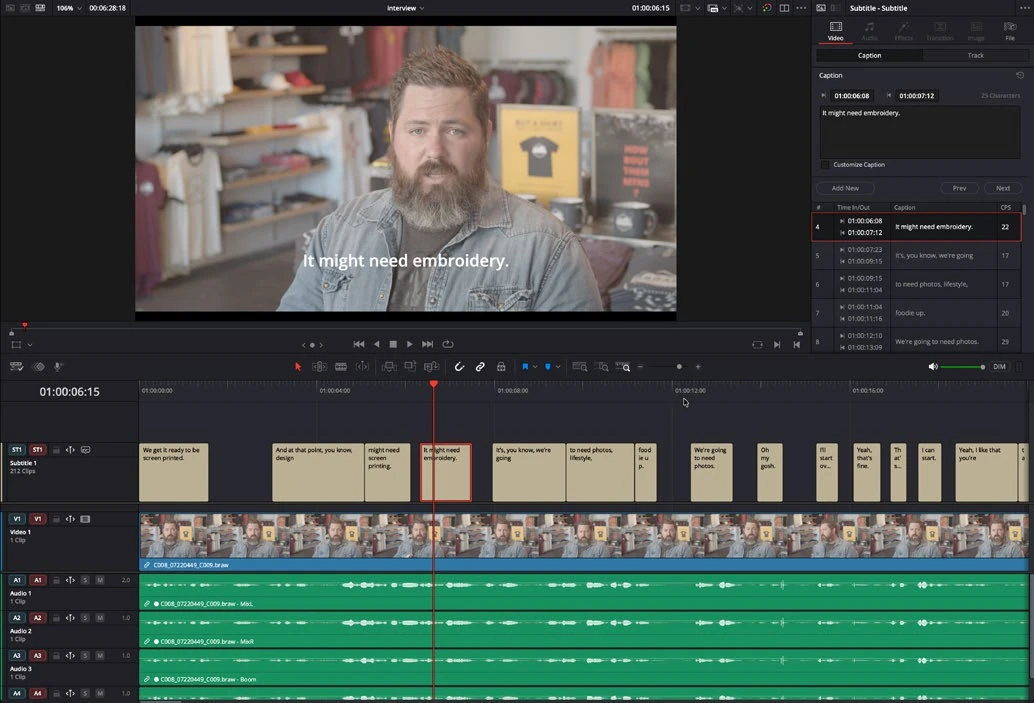
Create a subtitle track on your edit timeline. Enter a short spoken sentence manually and align its start and end with the actual speech.
Split long text at natural language boundaries. Keep lines concise, proofread names and punctuation, and allow a comfortable reading time instead of rapidly flashing words.
Set track-level styling consistently, then check placement against lower thirds and variable background brightness. Review at the actual intended viewing size.
Export a test with subtitles burned in, and a separate subtitle file when your delivery requires one. Reopen the subtitle file or rendered video and verify timing and characters.
Use a subtitle track for subtitle deliverables. A Text+ graphic may look like a caption, but it does not automatically become a structured subtitle file. Accessibility also includes meaning: important non-speech sounds may need concise descriptions when the audience cannot hear them.
A mistake to avoid
Automatic transcription can mishear names, technical terms, and overlapping speech. Never treat generated text as a verified transcript.
Your turn
Caption 30 seconds of dialogue, including a speaker change. Check every word against the recording and produce the subtitle format your imagined client requested.
Knowledge check
What is the difference between burned-in and separate subtitles?
Burned-in subtitles always have better spelling.
Burned-in text is part of the image; a separate subtitle file can be handled independently.
Separate subtitles contain the original camera media.
Check your answer
Burned-in text is part of the image; a separate subtitle file can be handled independently.
LESSON 05.04 · 45 MIN PRACTICE
Conform and round-trip without surprises
A conform rebuilds an edit from interchange data such as XML, AAF, or EDL. It is a translation between systems, so not every effect or timing operation survives unchanged.
Learning outcome Validate a translated timeline against a trusted reference export.
Work through it
Prepare a short reference export with visible timecode and clear audio sync. Keep an exported interchange file and a list of the source media supplied for the handoff.
Import the interchange into a duplicate project and connect camera originals. Compare timeline start timecode, resolution, frame rate, and source reel or filename identity.
Place the reference export on a comparison track. Check every edit, especially speed changes, nested sequences, transitions, transforms, and mixed-rate clips.
Rebuild unsupported effects explicitly. Record exceptions in a conform note, and send a short review render before investing in final grading or mixing.
Matching clip names alone is not enough when different cards reuse filenames. Timecode, reel information, duration, and visual comparison are important safeguards.
Your turn
Export and reimport a small timeline through an available interchange format. Compare it with the reference and document at least three items you checked, even if no mismatch occurs.
Knowledge check
What is the most reliable conform reference?
A reference movie checked against the reconstructed timeline.
Only the file size of the XML.
Only the number of clips in the bin.
Check your answer
A reference movie checked against the reconstructed timeline.
MODULE 06 · BEGINNER
Color: train your eye
Understand scopes, balance shots, and make a confident primary grade.
LESSON 06.01 · 25 MIN PRACTICE
The Color page and a useful node tree
A color node is a processing step. Serial nodes pass their result from one to the next, so order matters. Clear labels help you understand the grade and revisit it without guessing.
Learning outcome Read a serial node tree and isolate the purpose of each correction.
Work through it
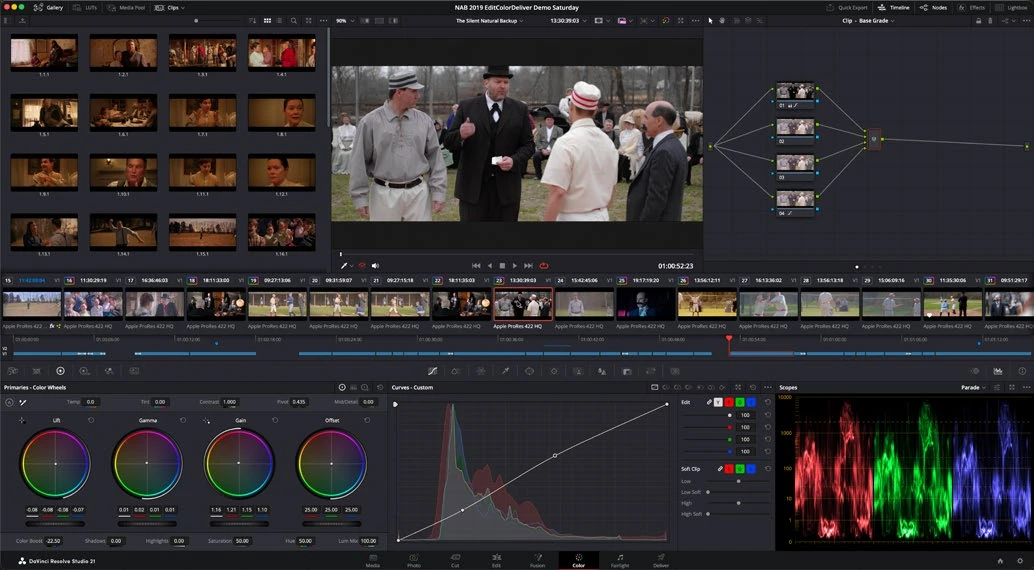
Open a short timeline on Color. Select a clip and identify the viewer, clip strip, node graph, grading palettes, and scopes. Open the waveform if it is hidden.
Use a simple serial structure: Balance, Contrast, and Look. Add nodes one at a time and label them. Keep the starting grade deliberately modest.
Make a small exposure or balance adjustment in the first node, then a contrast adjustment in the second. Bypass individual nodes and notice each contribution.
Save a Gallery still of the result and compare it with the ungraded image. Avoid confusing a saved still with a rendered media file; it is a reference and can carry grade data.
Adding more nodes does not automatically improve the image. An unlabeled chain can hide duplicate corrections, unwanted transforms, or compensating mistakes.
Your turn
Build and label a three-node grade. Explain what each node does and bypass it to demonstrate the difference.
Knowledge check
Why does serial node order matter?
Each node processes the output of the previous one.
Every node always receives the untouched original.
Resolve sorts all nodes alphabetically.
Check your answer
Each node processes the output of the previous one.
LESSON 06.02 · 25 MIN PRACTICE
Read waveform, parade, and vectorscope
Scopes reveal measurable signal relationships. The waveform shows brightness by horizontal position; RGB parade separates channels; the vectorscope displays color direction and saturation. They support your judgment rather than replacing it.
Learning outcome Use the three main scopes to support exposure and color decisions.
Work through it
Open scopes and display waveform and RGB parade. Move the playhead from a dark shot to a bright shot and correlate visible image areas with the trace.
Raise and lower exposure gently. Watch the waveform move. Check whether highlights flatten at a limit, which can signal clipping somewhere in the processing chain.
Find a neutral object with known lighting context. Compare its channel balance in RGB parade, but do not assume every object that looks white should be numerically neutral under colored lighting.
Open the vectorscope and increase saturation temporarily. Observe the trace move outward, then undo. Use skin-tone guidance as a reference, not a command to make every face identical.
A scope trace is not a beauty score. Deliberate silhouettes and colored lighting can be correct even when they do not fill an expected range.
Your turn
Choose three shots and describe their contrast and color using both the image and scopes. Identify a clipped highlight if one exists; do not invent one if it does not.
Knowledge check
What does the vectorscope primarily reveal?
Hue direction and saturation relationships.
The duration of each clip.
The exact lens focal length.
Check your answer
Hue direction and saturation relationships.
LESSON 06.03 · 35 MIN PRACTICE
Primary balance: exposure, contrast, and white balance
Primary corrections affect broad tonal or color relationships. First make the image believable and consistent; then decide how stylized it should become. Evaluate in the correct color-management context.
Learning outcome Produce a balanced base grade without relying on a creative LUT.
Work through it
Choose a representative shot and confirm its input interpretation. A log clip needs the intended color pipeline before you judge it as a finished display image.
Adjust overall exposure with an appropriate primary control. Establish useful detail in the subject and keep an eye on bright areas that matter to the scene.
Use temperature, tint, or channel controls to correct an unwanted cast. Compare neutral references under the same light and remember that mixed lighting may need a local correction later.
Shape contrast and pivot gently. Revisit saturation after contrast because stronger tonal separation can change the perceived intensity of color.
Pushing lift, gamma, and gain aggressively in opposite directions can create a brittle image. Start with the smallest adjustment that fixes the actual problem.
Your turn
Balance three shots of the same subject under different conditions. Keep a before/after still and describe the most important correction in each.
Knowledge check
What should usually come before a strong creative look?
A correct input pipeline and a coherent base balance.
A random LUT selected by its name.
Maximum saturation on every shot.
Check your answer
A correct input pipeline and a coherent base balance.
LESSON 06.04 · 40 MIN PRACTICE
Shot matching and a coherent scene
A sequence is judged across cuts, not as isolated stills. Shot matching aligns the relationships that should remain stable while respecting changes in camera angle, light, and composition.
Learning outcome Make a scene feel visually consistent across different shots.
Work through it
Choose a reference shot with useful exposure, skin, and environment detail. Save a Gallery still and use a wipe or split-screen comparison to view it beside another shot.
Match broad exposure and contrast first. Compare the same subject or surface rather than unrelated bright objects at different distances.
Match color balance and saturation next. Use scopes to verify a suspected cast, then watch the edit at normal speed to judge whether the cut still jumps.
Check the entire scene after local corrections. A shot that matches one neighbor may become inconsistent with the next; adjust the sequence as a whole.
Copying a grade is only a starting point. Different exposures, lenses, and lighting often require per-shot correction even when they came from the same camera.
Your turn
Match five shots into one scene. Export a short version and watch it away from the grading controls. Record the one remaining mismatch you notice most.
Knowledge check
What makes a good matching reference?
A representative shot with useful subject and lighting information.
Always the darkest frame in the timeline.
The shot with the largest file size.
Check your answer
A representative shot with useful subject and lighting information.
MODULE 07 · INTERMEDIATE
Color beyond the basics
Isolate, track, shape, and refine an image with intent.
LESSON 07.01 · 35 MIN PRACTICE
Qualifiers, windows, and clean keys
A qualifier selects pixels by characteristics such as hue, saturation, or luminance. A Power Window limits an area spatially. Combining them can make a selection more specific and more stable.
Learning outcome Build a localized correction with a stable, natural boundary.
Work through it
Add a new labeled node for a secondary correction. Use a qualifier to sample a target color, then inspect the selection in Highlight mode.
Adjust the selection ranges and matte cleanup carefully. Look for holes inside the subject and unwanted background areas entering the key.
Add a Power Window around the relevant region when similar colors elsewhere should not be affected. Feather the boundary and inspect it at full viewing size.
Make a restrained correction, then play the entire shot. A clean still-frame key can chatter or fail when the subject turns or lighting changes.
A harsh matte edge often looks like a cutout. Excessive denoising or blur can hide detail, so improve the selection before relying on aggressive cleanup.
Your turn
Isolate a colored object and change its saturation slightly while keeping nearby skin or neutral objects unchanged. Check the first, middle, and last frames.
Knowledge check
Why combine a qualifier with a window?
To constrain a color selection to the relevant area.
To make every pixel the same hue.
To raise the camera’s bit depth.
Check your answer
To constrain a color selection to the relevant area.
LESSON 07.02 · 35 MIN PRACTICE
Tracking and corrections that follow the subject
Tracking estimates movement over time. A correction should follow the intended subject without drifting, pulsing, or snapping. Automatic tracking is a starting point that needs review.
Learning outcome Validate and repair a moving local correction.
Work through it
Create a soft window around a face or object on a clear reference frame. Keep the window slightly generous so minor tracking errors do not expose a hard boundary.
Open the tracker and track forward and backward as needed. Watch the tracker’s behavior around occlusion, motion blur, and the subject leaving the frame.
Inspect the full shot. Correct failures with additional tracking segments, manual adjustments, or keyframes appropriate to the tool rather than hiding drift with extreme softness.
Temporarily exaggerate the correction to reveal whether its coverage slips. Return the adjustment to a subtle value before evaluating the final image.
Tracking a texture is not the same as understanding an object. A tracker may latch onto the background when the intended subject becomes hidden.
Your turn
Track a moving subject for five seconds, including one difficult moment. Add a gentle exposure correction and verify that the boundary is invisible during playback.
Knowledge check
When does a successful track need review?
Across the entire shot, especially occlusion and fast motion.
Only after deleting the original node.
Only on its starting frame.
Check your answer
Across the entire shot, especially occlusion and fast motion.
LESSON 07.03 · 35 MIN PRACTICE
Curves, hue relationships, and controlled looks
Curves map input values to output values. They can shape contrast or adjust one color relationship without globally changing the entire image. A useful look remains consistent across different shots.
Learning outcome Build a repeatable look while preserving important image relationships.
Work through it
On a balanced shot, add a dedicated look node. Make a gentle custom-curve adjustment and watch the effect on shadow and highlight separation.
Try a hue-specific curve to restrain an overly bright or saturated background color. Place surrounding control points so the adjustment transitions gradually.
Compare saturation in highlights, midtones, and shadows. Use an appropriate luminance-versus-saturation control when a tonal region becomes distracting.
Test the look on three contrasting images: skin, foliage, and a low-light scene. Refine the look so it does not destroy one of those cases.
A dramatic curve can clip or compress tonal regions even when the viewer still looks attractive. Inspect scopes and smooth gradients, not only the hero subject.
Your turn
Create a restrained warm-highlight/cool-shadow or other intentional look, then write down which parts of the image must stay natural. Apply it to three shots and make individual balancing adjustments.
Knowledge check
Why test a look on multiple kinds of shots?
Because curves only work on three clips at a time.
Because every shot should receive identical exposure values.
To expose failures that one attractive image might hide.
Check your answer
To expose failures that one attractive image might hide.
LESSON 07.04 · 40 MIN PRACTICE
Parallel nodes, layers, groups, and shared grades
Node topology describes how corrections combine. Serial processing is sequential. Parallel and layer structures combine branches differently. Groups separate shared scene work from individual shot adjustments.
Learning outcome Separate shared scene adjustments from individual shot corrections.
Work through it
Duplicate a balanced grade. Create two branches for separate corrections, such as a subject and background treatment, and combine them using the appropriate mixer. Compare the result with the serial version.
Inspect how branch order and compositing behavior change when using a Layer Mixer. Keep the selection and blending logic explicit rather than choosing a topology by appearance alone.
Place related clips into a group. Inspect Group Pre-Clip, Clip, and Group Post-Clip contexts, and decide which changes should be shared across the group.
Keep shot balance at the clip level while applying an appropriate shared treatment in a group context. Test a change and verify every group member, including an unusual shot.
A correction in the wrong group context can affect many shots unexpectedly. Check the current grading context before moving a control.
Your turn
Create a three-shot group with individual exposure corrections and a shared look. Change the shared look once and confirm all three shots update without losing their individual balance.
Knowledge check
Where should a correction unique to one shot normally live?
In every group’s shared output stage.
In that clip’s own grading context.
In the project filename.
Check your answer
In that clip’s own grading context.
MODULE 08 · ADVANCED
Color pipelines & finishing
Manage transforms, HDR, noise, and monitoring with professional care.
LESSON 08.01 · 45 MIN PRACTICE
Color management and scene-referred workflows
A color pipeline defines how camera values become working values and then display values. Input, working, and output color spaces are different roles. A predictable pipeline prevents accidental double transforms.
Learning outcome Explain and document each transform in a working color pipeline.
Work through it
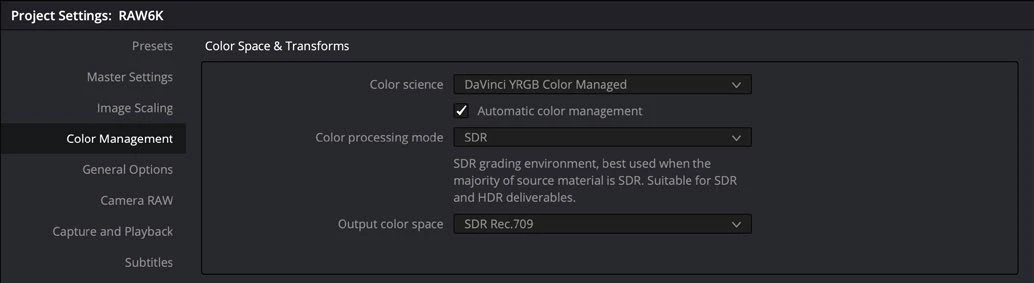
Duplicate a practice project and open Color Management settings. Explore DaVinci YRGB Color Managed. For a learning test, use a documented wide-gamut working setup and a deliberate SDR output target.
Assign or verify each clip’s input color space based on actual camera metadata or recording settings. Do not label a clip as log merely because it looks flat.
Compare the managed result with a manual Color Space Transform workflow in a separate test project. Document where input normalization and output rendering occur.
Check that a technical LUT or extra output transform is not duplicating work already handled by color management. Test neutral gradients and bright saturated objects for unexpected changes.
DaVinci Wide Gamut is a color-space choice, not a magic look. Incorrect input tagging can make a managed project consistently wrong.
Your turn
Make a one-page pipeline note listing your actual source, working, and output spaces. Demonstrate that removing an accidental duplicate transform improves the image.
Knowledge check
What commonly causes a double transform?
Applying a technical transform that color management already performs.
Labeling nodes clearly.
Saving a Gallery still.
Check your answer
Applying a technical transform that color management already performs.
LESSON 08.02 · 35 MIN PRACTICE
LUTs, gamut mapping, and order of operations
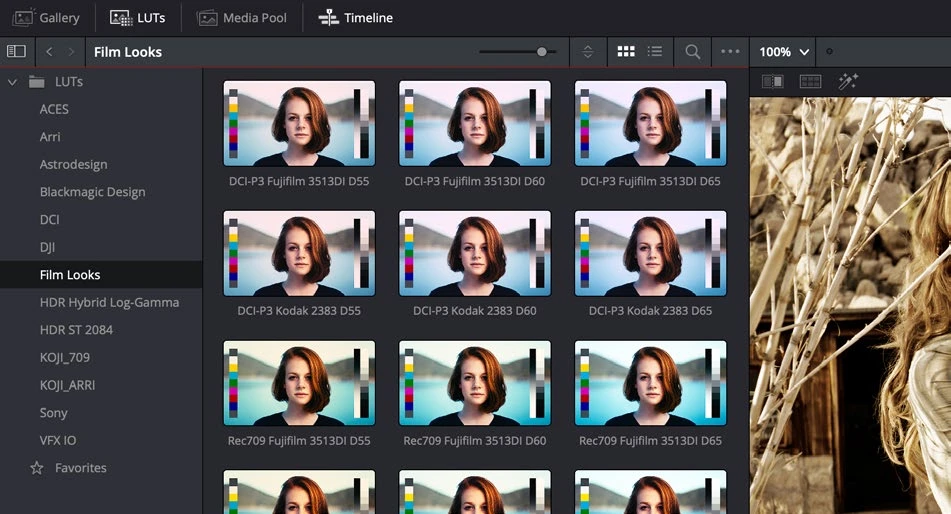
A LUT maps values through a predefined table. Some LUTs are technical transforms; others create a look. Neither automatically knows the actual camera encoding or the intended output display.
Learning outcome Use a LUT with known assumptions and a deliberate place in the processing chain.
Work through it
Read the LUT’s documentation and identify its expected input and output. If that information is missing, treat it as an uncertain creative asset rather than a trustworthy technical conversion.
Apply the LUT in a dedicated node at the appropriate stage of a controlled pipeline. Compare bypassed and active images while watching highlights and saturated colors.
Place exposure and balance adjustments before or after the LUT deliberately. Test both orders and describe why the response changes.
Compare a documented transform’s tone and gamut mapping with a simple LUT on bright, saturated material. Preserve the version that keeps necessary detail and meets your intended output.
A LUT can clip values outside its expected domain. Reducing its strength may change the look but does not necessarily repair an incorrectly designed pipeline.
Your turn
Build two otherwise identical grades with a balance correction on opposite sides of a LUT. Record differences in highlight behavior and saturation.
Knowledge check
What must be known before using a technical LUT?
Its intended input and output encodings.
Only its file size.
Only its filename’s cinematic wording.
Check your answer
Its intended input and output encodings.
LESSON 08.03 · 45 MIN PRACTICE
HDR, SDR trims, and trustworthy monitoring
HDR delivery changes the display target and the evaluation conditions. It is not simply a brighter SDR grade. Professional work requires a defined specification, suitable monitoring, and a tested output path.
Learning outcome Describe the additional decisions and validation an HDR master requires.
Work through it
Write the delivery requirements before grading: HDR transfer function and container, target mastering conditions, resolution, frame rate, and any required SDR companion version.
In a duplicate project, configure the intended managed output and review the HDR grading controls. Use zones to understand how exposure ranges can be shaped separately.
Compare the HDR grade with an SDR output or trim workflow. Revisit bright highlights, saturated colors, and face exposure rather than assuming a single transform makes both versions ideal.
Review the exported result through a compatible display path and inspect metadata required by the receiving platform. If you lack reference HDR monitoring, label the exercise as a pipeline study rather than an approved master.
A bright laptop display is not automatically a calibrated HDR reference monitor. Viewer appearance can also be affected by operating-system color handling.
Your turn
Prepare a written HDR/SDR comparison plan and test it on a short sequence. Record what your actual display can and cannot verify.
Knowledge check
Why does an SDR companion version need review?
An HDR timeline always destroys SDR footage.
Highlights, saturation, and perceived brightness can change under the SDR rendering.
SDR files cannot contain sound.
Check your answer
Highlights, saturation, and perceived brightness can change under the SDR rendering.
LESSON 08.04 · 40 MIN PRACTICE
Noise reduction, sharpening, grain, and finishing order
Finishing tools trade one quality for another. Noise reduction may remove detail; sharpening may emphasize artifacts; grain may unify texture. Inspect at realistic size and in motion.
Learning outcome Balance noise, detail, and texture using a final-format test render.
Work through it
Choose a noisy shot and create a separate reduction node. In Studio, compare modest temporal and spatial reduction settings using a representative moving section.
Inspect hair, fabric, moving edges, and fine texture at 100%. Increase settings only until distracting noise is controlled, not until all natural texture disappears.
Apply sharpening cautiously after judging the actual output resolution. Check high-contrast edges for halos and compression-sensitive detail.
If using grain, evaluate its size and strength at the final resolution. Render a short sample using the delivery codec because compression may alter or erase subtle texture.
A paused clean frame may hide temporal smearing. Judge noise reduction during movement, particularly faces and fine repeated patterns.
Your turn
Create three exports: untouched texture, moderate cleanup, and deliberately excessive cleanup. Compare motion and detail, then choose and justify the moderate result.
Knowledge check
What is a warning sign of excessive temporal noise reduction?
A change in the project’s name.
More timeline markers.
Smearing or loss of detail during motion.
Check your answer
Smearing or loss of detail during motion.
MODULE 09 · INTERMEDIATE
Fusion: think in nodes
Build composites and motion graphics from a few understandable parts.
LESSON 09.01 · 30 MIN PRACTICE
MediaIn, MediaOut, and the flow of an image
Fusion is a node-based compositor. Connections describe how images and masks flow through operations. MediaOut is the result returned to the timeline; a disconnected effect will not change that result.
Learning outcome Trace a simple Fusion graph and explain why each connection matters.
Work through it
Open a simple timeline clip on Fusion. Identify MediaIn and MediaOut, the node area, the two viewers, and the Inspector. Select a node and display it in a viewer.
Insert a Transform between MediaIn and MediaOut. Adjust Center or Size and confirm the output changes. Disconnect it briefly on a practice copy to understand the graph.
Add a Background and a Text+ node for a separate graphic. Inspect each node independently before trying to combine them.
Read the graph from inputs to output. Label nodes by purpose, keep connections readable, and compare the viewer of an intermediate node with the final MediaOut.
Looking at the wrong viewer node can make a working effect appear broken. Confirm which node the viewer displays before changing the graph.
Your turn
Create a three-node flow that scales or repositions a clip. Demonstrate the original, intermediate, and final results in the viewers.
Knowledge check
Which node returns a Fusion composition to the timeline?
Any disconnected Background node.
MediaOut.
The clip’s bin name.
Check your answer
MediaOut.
LESSON 09.02 · 35 MIN PRACTICE
Merge, masks, and transparent edges
A Merge combines foreground and background images. A mask restricts an operation. Alpha represents transparency, and its interpretation matters at soft edges.
Learning outcome Combine two elements while preserving clean transparency.
Work through it
Create a Background node and a Text+ node. Connect them to the intended background and foreground inputs of a Merge, then connect Merge to MediaOut.
Add a shape mask to restrict the background or an effect. Move and feather the mask, observing which node it affects rather than assuming it applies to the whole composition.
Inspect the image’s alpha channel. Compare fully opaque, transparent, and partially transparent pixels at the boundary of your graphic.
Place the result over a different background. Check for dark or bright fringes that can reveal premultiplication or compositing mistakes, particularly after color or blur operations.
Swapping Merge inputs changes the layering. A mask connected to the wrong input may affect a different operation than intended.
Your turn
Build a lower-third panel with transparent surrounding space, readable text, and a soft edge where appropriate. Preview it over both dark and bright footage.
Knowledge check
What does alpha describe?
The camera’s shutter speed.
The opacity or transparency of image pixels.
The sequence’s audio loudness.
Check your answer
The opacity or transparency of image pixels.
LESSON 09.03 · 40 MIN PRACTICE
Text+ animation and the Spline editor
Fusion animation becomes manageable when timing and shape are considered separately. Keyframes establish important moments; curves determine how values travel between those moments.
Learning outcome Control animation timing and easing without unnecessary keyframes.
Work through it
Create a Text+ title with a short phrase. Establish a readable final layout before animating it. Keep the message meaningful without motion.
Set a starting keyframe and an ending keyframe for one property such as position or opacity. Preview at normal speed to choose the duration.
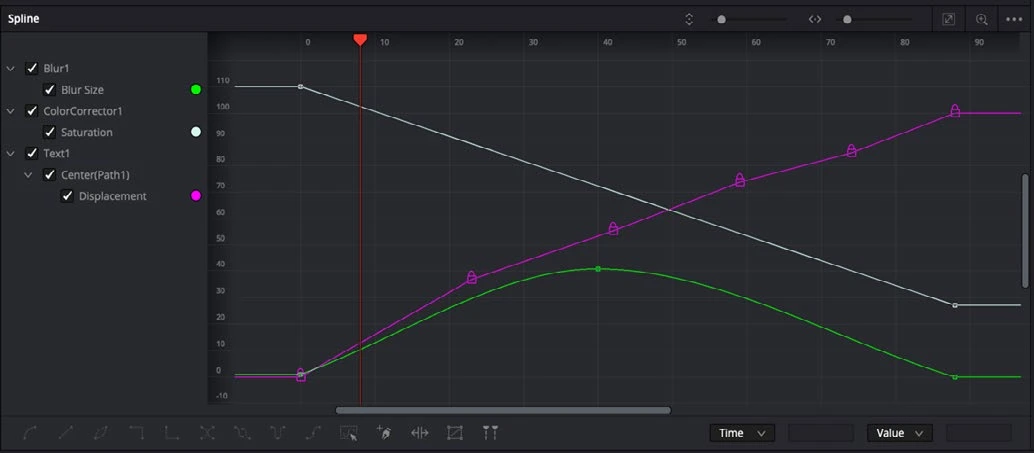
Open the Spline editor, select the animated property, and compare linear interpolation with a eased curve. Adjust handles to control acceleration without accidental overshoot.
Duplicate or offset related elements to create a deliberate sequence. Keep the total reading time long enough after all elements settle.
A smooth curve does not guarantee good timing. If the audience is still decoding the text when it leaves, simplify the animation or hold longer.
Your turn
Animate a title and subtitle with a short offset. Deliver a five-second composition that includes at least two seconds of stable reading time.
Knowledge check
What does the Spline editor help you refine?
How animated values change between keyframes.
The camera’s original exposure.
The project backup location.
Check your answer
How animated values change between keyframes.
LESSON 09.04 · 50 MIN PRACTICE
Planar tracking and a simple screen replacement
Planar tracking estimates the movement of a flat surface. It is useful for signs and screens, but reflections, occlusion, and changing perspective still need careful compositing.
Learning outcome Combine a validated planar track with a visually matched replacement.
Work through it
Choose footage with a visible flat surface and enough texture. On a useful reference frame, define a tracking region that stays on the same plane and avoids unrelated moving objects.
Track in both directions as needed. Review the entire range, especially when the surface rotates, blurs, or becomes partly hidden.
Use the tracked motion with the available planar transform or corner-pin workflow to position your replacement graphic. Confirm the reference frame and coordinate assumptions.
Match the replacement’s brightness, softness, grain, and motion blur to the shot. Mask foreground occlusions separately and preserve natural reflections where the material supports it.
Perfect corner alignment alone does not make a believable composite. An overly sharp or bright insert will still look pasted on.
Your turn
Replace a flat sign or screen in a short shot using a graphic you create. Check the corners frame by frame at the most difficult moment, then review at speed.
Knowledge check
What should a planar tracking region follow?
Any high-contrast object moving independently.
Features belonging to the same flat surface.
Only the frame border.
Check your answer
Features belonging to the same flat surface.
MODULE 10 · ADVANCED
Fusion: advanced compositing
Work with keys, roto, 3D, reusable graphics, and render efficiency.
LESSON 10.01 · 50 MIN PRACTICE
Green screen, spill, and edge integration
Keying separates foreground from a background color. A believable result also requires edge treatment, color integration, and a plausible new environment. Removing green is only one part of the work.
Learning outcome Create a usable matte and integrate its edges into a new background.
Work through it
Use a well-exposed green-screen shot with clean separation where possible. Add an appropriate keyer such as Delta Keyer and sample the backing color.
Inspect the matte separately. Preserve fine hair and semi-transparent edges while removing unwanted background. Use a garbage mask to exclude areas that never belong to the subject.
Reduce green spill carefully without making skin or clothing unnaturally gray. Inspect the result against both a neutral background and the intended scene.
Match light direction, contrast, softness, and texture. Check motion-blurred edges and any transparent objects, then render a short test.
Crushing the matte to solid black and white can remove natural edge transparency. A hard cutout is not the same as a clean key.
Your turn
Composite a short keyed shot over two different backgrounds. Write down which background integrates more convincingly and why.
Knowledge check
Why inspect a key over multiple backgrounds?
A background changes the source timecode.
Edge and spill problems can hide against one background.
The keyer requires exactly two backgrounds.
Check your answer
Edge and spill problems can hide against one background.
LESSON 10.02 · 50 MIN PRACTICE
Rotoscoping and paint fixes that survive motion
Rotoscoping defines changing boundaries over time. The most efficient shapes follow stable parts of the subject rather than forcing one complex outline to solve every movement.
Learning outcome Create and refine a moving matte without visible edge chatter.
Work through it
Choose a short shot with a manageable moving object. Build separate simple shapes for parts that move differently, instead of one outline with excessive points.
Set shapes on important change frames first: direction changes, occlusions, and poses. Let interpolation fill the easy motion, then inspect the in-between frames.
Combine tracking with manual shape animation when useful. Keep the edge softness proportional to the source’s focus and motion blur.
For a small paint repair, choose a clean source area and validate the repair over the full duration. A still-frame patch can reveal itself when texture, lighting, or perspective changes.
Adding more control points can make an outline harder to animate consistently. Use the fewest points that describe the shape well.
Your turn
Isolate a moving object for two seconds and use the matte for a subtle local effect. Review both the matte and final composite in motion.
Knowledge check
Why split roto into simpler shapes?
Different parts may move independently and need separate control.
It always eliminates the need to review motion.
It changes the clip’s codec.
Check your answer
Different parts may move independently and need separate control.
LESSON 10.03 · 50 MIN PRACTICE
3D scenes, cameras, lights, and Renderer3D
A 3D graph contains geometry, cameras, and lights rather than only flat images. A renderer converts the scene into a 2D image that can return to the normal compositing flow.
Learning outcome Construct the minimum 3D scene and return it to a 2D composite.
Work through it
Create a simple Text3D or shape object and connect it into Merge3D. Add a Camera3D and inspect the scene from both an interactive view and the camera view.
Add an appropriate light and adjust its relationship to the object. Check material response and shadow settings if your renderer and scene support them.
Connect the scene to Renderer3D, then send its 2D result through a Merge or directly to MediaOut. Choose the intended camera in the renderer.
Animate a restrained camera or object move. Check clipping, framing, anti-aliasing, and render cost before adding more geometry or effects.
A 3D node cannot be treated as a finished 2D image until it is rendered. Mixing scene connections with image connections is a common beginner failure.
Your turn
Build a five-second 3D title with one light and a slow camera move. Render a test and check edge quality and legibility.
Knowledge check
What is Renderer3D’s role?
Convert a 3D scene into a 2D image.
Import camera media automatically.
Normalize all audio levels.
Check your answer
Convert a 3D scene into a 2D image.
LESSON 10.04 · 50 MIN PRACTICE
Particles, macros, and reusable motion systems
Reusable graphics need a clear internal design and a small set of meaningful exposed controls. A macro should make common changes easier without exposing every implementation detail.
Learning outcome Create a reusable graphic with predictable controls and performance.
Work through it
Build a small particle setup with an emitter and renderer appropriate to the composition. Change emission, lifespan, and motion one at a time to understand their effect.
Limit the active time range and preview resolution while designing. Inspect a full-quality sample before deciding that the system is ready.
Select a simple finished node group and create a macro with only the controls a future user needs: text, color, scale, and timing where appropriate.
Test the macro on a second timeline with different duration or resolution. Rename controls clearly, check defaults, and preserve a source composition for maintenance.
Resolve 21 includes Krokodove graphics tools, and 21.1 expands that collection. Treat new tools as additional building blocks: inspect their input/output types and help descriptions, then test them in a minimal graph before embedding them in a reusable composition.
A mistake to avoid
A macro that only works at one frame range or resolution is fragile. Expressions and timing assumptions must be tested outside the original composition.
Your turn
Package a reusable title or particle accent and apply it to two different clips. Document the editable controls in your notebook.
Knowledge check
Which controls should a useful macro expose?
Every internal parameter regardless of purpose.
Only the project name.
The meaningful adjustments its user needs.
Check your answer
The meaningful adjustments its user needs.
MODULE 11 · BEGINNER
Fairlight: clear, intentional sound
Edit dialogue, control levels, and build a balanced soundscape.
LESSON 11.01 · 25 MIN PRACTICE
Tracks, buses, meters, and the signal path
Audio flows from clips through tracks and buses to an output. Track controls affect a channel strip; bus controls affect a combined signal. Knowing the route makes silence and overload easier to diagnose.
Learning outcome Trace an audio signal and distinguish mix level from monitoring level.
Work through it
Open your short edit in Fairlight. Identify the timeline, mixer, meters, and main output bus. Name dialogue, music, and effects tracks clearly.
Play a dialogue clip and watch both its track meter and the output meter. Mute and solo deliberately, then restore the normal state.
Inspect bus routing and output assignment. Follow one track to the main bus. Confirm whether your track is mono or stereo and that its source channels are mapped correctly.
Lower the monitor volume without changing the mix, then compare it with changing the track fader. Learn which control affects listening comfort and which affects the exported balance.
Monitor volume is not an export-level control. Turning your speakers down does not fix an overloaded mix.
Your turn
Draw the signal path for one dialogue clip and one music clip. Diagnose a deliberately muted track, then restore it.
Knowledge check
Which change affects listening volume without necessarily changing the render?
Changing a clip’s gain.
Changing monitor level.
Lowering the dialogue track fader.
Check your answer
Changing monitor level.
LESSON 11.02 · 35 MIN PRACTICE
Dialogue editing, room tone, and clean boundaries
Good dialogue editing preserves meaning, rhythm, and a consistent acoustic space. Removing every pause and breath usually sounds less natural than making selective corrections.
Learning outcome Create a dialogue edit with natural rhythm and unobtrusive boundaries.
Work through it
Listen to the complete exchange before cutting. Mark distractions, false starts, and sections that can be shortened without changing the speaker’s meaning.
Trim dialogue at sensible boundaries. Use small fades to prevent clicks, and listen across every edit instead of judging only the waveform.
Fill exposed gaps with suitable room tone from the same environment. Match its level and avoid an obvious repeating pattern.
Adjust clip gain to reduce large level differences before track processing. Preserve emotional dynamics rather than flattening every word.
Silence is not the same as room tone. Dead gaps between words can make a noisy recording sound more edited, not cleaner.
Your turn
Edit a 30-second spoken passage with at least three cuts. Listen without looking at the timeline and identify any change in noise floor or unnatural pause.
Knowledge check
Why use room tone in a dialogue gap?
To make every pause louder than speech.
To preserve the acoustic continuity of the space.
To replace the speaker’s voice.
Check your answer
To preserve the acoustic continuity of the space.
LESSON 11.03 · 40 MIN PRACTICE
EQ, compression, and de-essing with restraint
Equalization shapes frequency balance. Compression reduces level differences according to its settings. De-essing controls excessive sibilance. Each tool should solve a specific audible problem.
Learning outcome Apply processing to a named problem and evaluate it without loudness bias.
Work through it
Choose a dialogue passage and match listening levels when comparing processed and unprocessed sound. Louder often seems better even when quality has not improved.
Use EQ to address a clear problem such as rumble or boxiness. Make small changes and check the voice does not become thin or unnatural.
Add gentle compression. Observe gain reduction on louder phrases, then adjust threshold, ratio, attack, and release while listening to consonants and the return to quieter words.
Use de-essing only if sharp sibilants remain distracting. Check that words do not become dull or lisped. Recompare the bypassed signal at similar perceived loudness.
Compression cannot separate speech from noise and may make background noise more audible between phrases. Fix editing and recording problems before stacking processors.
Your turn
Build a modest dialogue chain and explain the purpose of each processor. Export a before/after comparison with matched perceived levels.
Knowledge check
Why level-match a before/after comparison?
A louder signal can seem better even without better sound.
It makes every microphone identical.
It removes all background noise automatically.
Check your answer
A louder signal can seem better even without better sound.
LESSON 11.04 · 40 MIN PRACTICE
Music, effects, panning, and automation
A mix directs attention. Dialogue normally needs space to remain intelligible, while music and effects supply emotion and environment. Automation changes the balance over time.
Learning outcome Create a coherent balance that changes intentionally with the scene.
Work through it
Place music and effects on separate named tracks. Trim them to the story rather than letting a full-length music file determine the edit.
Set an initial balance with dialogue clearly understandable. Check quiet words, not only the loudest sentence. Keep effects at a believable perspective.
Use pan controls to create a deliberate stereo space. Keep essential content compatible with mono playback and avoid moving dialogue arbitrarily across the image.
Write or draw automation for music dips and scene transitions. Review automation mode before playback so you do not accidentally overwrite a finished pass.
A mix that sounds exciting at high volume may become unintelligible at normal listening levels. Recheck at a comfortable low level.
Your turn
Mix a 30-second scene with dialogue, music, and at least two effects. Add one gentle music dip under speech and verify it on both headphones and speakers if available.
Knowledge check
What does automation allow?
Every sound to have equal loudness.
Mix parameters to change over time.
Source media to become copyright-free.
Check your answer
Mix parameters to change over time.
MODULE 12 · ADVANCED
Fairlight: mixing & delivery
Build buses, record voiceover, measure loudness, and deliver usable stems.
LESSON 12.01 · 40 MIN PRACTICE
Bus architecture, submixes, and track folders
A submix combines related tracks so they can be controlled together. Track folders organize the session visually; grouping tracks and routing their audio are related but distinct ideas.
Learning outcome Build an understandable mix structure without duplicate or missing routes.
Work through it
Create a small session with multiple dialogue, music, and effects tracks. Group or place related tracks in folders for navigation; Resolve 21 adds Fairlight folder organization.
Set up buses appropriate to the mix, such as Dialogue, Music, and Effects feeding a main mix. Verify routing one section at a time with solo and meters.
Apply shared processing only where it benefits the group. Check that a bus is not receiving the same signal twice through an unintended route.
Change the Dialogue bus level and confirm all intended dialogue follows while music remains independent. Restore levels and save a version before complex routing changes.
A folder is not proof of bus routing. Verify signal flow in the mixer rather than inferring it from track layout.
Your turn
Create a routing diagram for a small documentary mix. Explain which controls organize the view and which actually change the audio path.
Knowledge check
What makes a submix different from a visual folder?
A folder always changes the export codec.
A submix combines routed audio signals.
A submix only changes track colors.
Check your answer
A submix combines routed audio signals.
LESSON 12.02 · 40 MIN PRACTICE
Record voiceover and manage takes
A useful voiceover recording is intelligible, consistent, and easy to edit. Room acoustics, microphone placement, and performance often matter more than later repair tools.
Learning outcome Record usable narration and organize alternate performances.
Work through it
Select a quiet location and a consistent microphone position. Set the input device in Resolve preferences and route it to a suitable recording track.
Arm the track and test input level with the loudest expected phrase. Leave headroom; do not aim for the top of the meter. Check monitoring latency and avoid speaker feedback.
Record a short test, stop, and listen back. Check for clipping, hum, plosives, room reflections, and accidental recording of the wrong input.
Record multiple clearly labeled takes. Keep a little room tone and space at the edges. Choose the best performance, then use small edits and fades to assemble a natural result.
An input that looks active is not necessarily the intended microphone. Always listen to the recorded test before committing to a long take.
Your turn
Record a 20-second narration twice. Choose one phrase from the alternate take and integrate it without an obvious change in tone or ambience.
Knowledge check
What should happen before recording a full narration?
Normalize an empty track.
Record and listen to a short input and level test.
Set every input to maximum gain.
Check your answer
Record and listen to a short input and level test.
LESSON 12.03 · 45 MIN PRACTICE
Loudness, true peak, and specification-driven mixing
Peak level and perceived loudness are different measurements. Integrated loudness describes a program over time; true peak estimates intersample peaks. The destination’s specification determines your targets.
Learning outcome Measure a complete export and compare it with a stated delivery requirement.
Work through it
Write the receiving platform or client’s actual loudness and peak requirements. Do not assume one LUFS number is correct for every delivery.
Insert or use the appropriate loudness meter on the final mix path. Reset it, then play the entire program so the integrated reading covers the real content.
Adjust the mix and output control deliberately. Use limiting where appropriate to meet peak constraints, but listen for pumping, flattened impacts, and distortion.
Render the intended audio format and measure the exported file again. Check channels, sample rate, duration, and beginning/end silence alongside the loudness reading.
Normalizing clips individually does not guarantee a compliant final program. The sum of tracks and later processing changes the final measurement.
Your turn
Choose an explicit practice target and label it as your exercise specification. Measure a full mix, revise it, and record the final integrated loudness and true-peak result.
Knowledge check
Why measure the whole program for integrated loudness?
It automatically changes the client’s specification.
Only the first frame contains audio.
The value represents the program over time.
Check your answer
The value represents the program over time.
LESSON 12.04 · 45 MIN PRACTICE
Stems, surround, immersive sound, and mix QC
Stems are grouped audio deliverables such as dialogue, music, and effects. They must align in time and combine as intended. Multichannel and immersive work adds channel-layout and monitoring requirements.
Learning outcome Deliver aligned stems and recognize the extra validation required for multichannel work.
Work through it
Define the required stems, channel layouts, start time, duration, and file naming before exporting. Make sure each stem’s routing includes the intended material and processing.
Render a full mix and synchronized stems. Reimport them into a clean timeline and compare their combined result with the full mix, accounting for any nonlinear bus processing that prevents a perfect sum.
For multichannel practice, inspect the bus format and channel mapping. Confirm actual channel order against the delivery requirement; do not infer it from a filename.
Perform a final listening pass for clicks, missing words, accidental mutes, excessive noise reduction, sync errors, and truncated reverb tails. Check downmix behavior where required.
A stereo pair labeled surround is not a surround master. Immersive formats require the correct authoring, renderer, monitoring, and delivery specification.
Your turn
Deliver dialogue, music, and effects stems for your short film. Reimport all three at the same start time and verify alignment and coverage.
Knowledge check
What must synchronized stems share?
A defined common start and compatible duration.
Identical musical content.
The same number of source clips.
Check your answer
A defined common start and compatible duration.
MODULE 13 · INTERMEDIATE
Studio AI, with creative judgment
Use intelligent tools, then inspect the result like a professional.
LESSON 13.01 · 35 MIN PRACTICE
Transcription, text-based editing, and IntelliScript
Text-based workflows help navigate spoken content. They can accelerate assembly, but the transcript is an interpretation of the recording. The editor remains responsible for meaning and context.
Learning outcome Use text to accelerate editing while verifying both language and performance.
Work through it
Choose a short spoken clip and run the available transcription workflow in Studio. Confirm language and any relevant options before processing.
Read along while listening. Correct or note names, numbers, and phrases that were misheard before using the text to make decisions.
Use the transcript to locate and assemble a few useful sections. Leave enough handles for natural speech transitions and check the resulting timeline against the actual recording.
If using IntelliScript with a prepared script, compare its proposed assembly with the intended performance. Replace unsuitable takes and restore any context that the automatic assembly omitted.
An accurate-looking sentence can hide a wrong word or missing qualification. Do not let text convenience change what the speaker meant.
Your turn
Build a 20-second interview excerpt from a longer recording using text navigation. Verify that the edit preserves the speaker’s meaning and sounds natural across every cut.
Knowledge check
What must be checked after a text-driven assembly?
Only the export filename.
Only the transcript font.
The spoken meaning, chosen takes, and edit boundaries.
Check your answer
The spoken meaning, chosen takes, and edit boundaries.
LESSON 13.02 · 40 MIN PRACTICE
Magic Mask and Depth Map as starting points
AI segmentation estimates a subject or depth relationship. It can produce useful isolation quickly, but difficult edges, motion blur, and occlusion still require judgment and cleanup.
Learning outcome Inspect and refine AI-generated mattes before using them in a final grade.
Work through it
Choose a short shot with a distinct moving subject. Add a dedicated node and use Magic Mask’s available selection controls on a useful reference frame.
Track the selection through the shot and inspect the matte, particularly hair, hands, crossing objects, and the first and last frames.
Use the mask for a subtle correction before attempting a dramatic background replacement. Repair failures with additional guidance, windows, or an alternative selection technique.
Test Depth Map on another node for a broad spatial separation. Adjust the depth range and softness while checking that the estimated depth remains stable during movement.
A plausible depth preview is not an accurate 3D scan. Blur and relighting based on unstable depth can pulse or create halos.
Your turn
Create a gentle background-versus-subject separation in a five-second shot. Exaggerate it temporarily to find matte failures, then restore a natural strength.
Knowledge check
What is a reliable way to reveal mask problems?
Assume a recognized person has perfect edges.
Check only a thumbnail.
Temporarily exaggerate the correction and inspect the entire motion.
Check your answer
Temporarily exaggerate the correction and inspect the entire motion.
LESSON 13.03 · 35 MIN PRACTICE
Voice Isolation, dialogue tools, and AI Audio Assistant
AI audio tools can help separate or balance material, but aggressive settings may introduce metallic textures, missing consonants, or unstable ambience. Listen to the problem and the side effects together.
Learning outcome Evaluate AI audio processing by intelligibility and artifacts, not just noise removal.
Work through it
Select dialogue with a clearly audible noise problem. Save an unprocessed reference and choose a representative section including quiet words and breaths.
Apply Voice Isolation or the appropriate dialogue tool gently. Compare at matched perceived loudness and listen on headphones for damaged speech texture.
If using Dialogue Separator or other available separation controls, change one component at a time. Preserve enough room character for the scene to feel believable.
Run AI Audio Assistant on a duplicate timeline when appropriate. Review its level, routing, and processing decisions, then measure and listen to the complete result rather than treating it as a finished mix.
Less noise is not automatically better sound. An overprocessed voice can be more distracting than a modest, stable background.
Your turn
Make two cleanup versions of a short passage: conservative and aggressive. Choose the version that preserves speech best, even if some background remains.
Knowledge check
Which result should you prefer?
The lowest noise at any cost to speech.
The most intelligible natural voice with acceptable remaining noise.
Whichever preset has the strongest name.
Check your answer
The most intelligible natural voice with acceptable remaining noise.
LESSON 13.04 · 35 MIN PRACTICE
IntelliSearch, CineFocus, and responsible AI review
Resolve 21 adds new AI-assisted discovery and image tools. Treat search results and generated image adjustments as proposals: useful when they save time, risky when they replace verification.
Learning outcome Use new Studio tools while documenting their limits on your own footage.
Work through it
Use IntelliSearch on a small, clearly organized test set. Search for an identifiable object or spoken topic and compare the returned clips with what you know is actually in the bin.
Record a missed result and an irrelevant result. Adjust the search wording instead of assuming the indexed interpretation is complete.
Test CineFocus on a short shot with clear depth and subject separation. Make a restrained adjustment and inspect boundaries, occlusions, and changes in focus during movement.
Compare the processed render with the original. Keep documentary or factual context in mind when a synthetic adjustment changes how an event appears.
AI-assisted refocusing cannot guarantee recovery of detail that the camera never captured. Inspect actual output pixels rather than believing the tool name.
Your turn
Create a review note listing what the AI tool did well, where it failed, and which manual method you would use for repair.
Knowledge check
How should an AI search result be treated?
As a candidate that still needs verification.
As a replacement for source backups.
As proof that no other matching footage exists.
Check your answer
As a candidate that still needs verification.
MODULE 14 · INTERMEDIATE
Photo: a still-image workflow
Bring deliberate color, local adjustments, and consistency to photographs.
LESSON 14.01 · 30 MIN PRACTICE
Photo page, albums, and source organization
Resolve 21 includes a Photo page for still photography. The goal is to organize images, preserve source information, and apply a consistent editing process without confusing photo and video delivery needs.
Learning outcome Organize a small photographic series and preserve clear source-to-edit relationships.
Work through it
Open Photo in a practice project and locate its image organization and viewing controls. Import a small set of JPEG, TIFF, or supported camera RAW files that you own.
Organize the images into a meaningful album or collection using the available Photo controls. Separate selects from alternates so review remains focused.
Inspect image dimensions, orientation, and source information. A still may be much larger than a video timeline and deserves its own crop and export decisions.
Choose one representative photograph as a reference. Make a small adjustment, then compare it with the unedited source using the available before/after view.
A photo’s native resolution is not the same as your current video timeline resolution. Confirm actual output dimensions before exporting stills.
Your turn
Organize six photographs into a coherent mini-series and select three final candidates. Write one sentence explaining the visual connection between them.
Knowledge check
Why inspect source dimensions for a photo?
Every photo must become 1920 × 1080.
Resolution determines the image’s story automatically.
Still-image delivery may need a different resolution and crop than video.
Check your answer
Still-image delivery may need a different resolution and crop than video.
LESSON 14.02 · 35 MIN PRACTICE
RAW interpretation, white balance, and highlight detail
A RAW file contains camera sensor-derived information that must be interpreted into a viewable image. Available controls and support depend on the camera format and Resolve version.
Learning outcome Distinguish source interpretation from later creative grading.
Work through it
Import a supported RAW photograph and compare the available source controls with those of a JPEG. Record which adjustments are available for the actual format you have.
Set a sensible white balance using a known reference and the scene’s intended lighting. Avoid neutralizing purposeful warm or cool illumination.
Adjust exposure while inspecting important highlights. Determine whether detail exists in the source or whether the bright area was irretrievably clipped during capture.
Apply a restrained base contrast and check gradients, fine texture, and saturated objects at full size before moving to creative styling.
RAW is not unlimited exposure latitude. Clipped capture channels and missed focus cannot always be repaired in post.
Your turn
Edit one RAW file and one JPEG of a similar scene. Compare highlight and white-balance flexibility without assuming that every RAW file can recover every mistake.
Knowledge check
What determines whether lost highlight detail can be recovered?
Only the strength of the saturation slider.
The number of albums in the project.
Whether useful information remains in the source data.
Check your answer
Whether useful information remains in the source data.
LESSON 14.03 · 40 MIN PRACTICE
Crop, local corrections, and a coherent photo series
A strong still has a clear visual hierarchy. Cropping directs attention; local corrections support the subject; matching makes a series feel intentional without making all images identical.
Learning outcome Produce a consistent photographic series with purposeful framing.
Work through it
Choose a crop based on the final use: landscape presentation, square layout, or portrait. Preserve the important subject and inspect edges for distracting fragments.
Apply a base balance, then use soft local corrections to guide attention. Keep a dedicated node for each meaningful adjustment so revisions stay clear.
Match the series using a representative image. Compare skin, neutrals, and contrast while respecting differences in lighting and composition.
Review the set as a group and at full image size. Look for over-sharpened edges, halos, inconsistent saturation, or a crop that breaks the sequence’s visual rhythm.
Copying a grade without rebalancing each photograph can exaggerate exposure differences. Shared style and individual correction should work together.
Your turn
Finish three photographs as a small series with one shared look. Include at least one local adjustment and explain its purpose.
Knowledge check
What should a local correction accomplish?
Make every region equally bright.
Replace all source organization.
Support a specific visual intention without exposing its boundary.
Check your answer
Support a specific visual intention without exposing its boundary.
LESSON 14.04 · 35 MIN PRACTICE
Photo exports, tethering, and print awareness
A finished photo needs an output suited to its destination. Color space, dimensions, file format, and compression influence how it is used. Tethering adds capture reliability and file-management concerns.
Learning outcome Choose an output deliberately and verify the exported photograph.
Work through it
Define the output use before export. For web review, choose suitable dimensions and a broadly supported format; for print, follow the printer’s actual file and color requirements.
Export a test photo using the Photo page’s available controls. Reopen the output and verify pixel dimensions, orientation, color appearance, and any required metadata.
If you have a supported tethered camera, test connection and capture into a clearly named destination. Verify that images are saved correctly before an important session.
Keep original files, project data, and final exports in separate organized locations. Record export choices for the series so later additions can match.
A screen preview is not a reliable print proof by itself. Paper, ink, viewing light, and the printer’s workflow affect the final result.
Your turn
Export one photo for screen review and prepare a written specification for a print version. Compare the screen export with the graded source in a color-aware viewer.
Knowledge check
What should determine a print export’s settings?
A universal preset guessed from the image title.
The actual requirements of the printer and intended output.
The video timeline’s audio format.
Check your answer
The actual requirements of the printer and intended output.
MODULE 15 · INTERMEDIATE
Deliver with confidence
Choose formats, render correctly, and check the actual final file.
LESSON 15.01 · 35 MIN PRACTICE
Containers, codecs, bit depth, and compression
A container holds streams and metadata. A codec encodes picture or sound. File extension alone does not describe quality, compatibility, or the amount of information preserved.
Learning outcome Choose a deliverable using its actual encoding requirements rather than its extension.
Work through it
Inspect a source file’s container and codec in metadata. Distinguish a .mov or .mp4 container from its encoded video and audio streams.
Compare a compressed review format with a supported high-quality intermediate format. Note differences in file size, playback, and suitability for further editing.
Review resolution, frame rate, bit depth, chroma sampling, and audio settings supported by your system and selected codec. Some options vary by operating system, hardware, and Studio support.
Export a short difficult section with motion, fine detail, or gradients. Compare it at normal viewing size and 100% before selecting settings for the whole film.
A larger bitrate does not guarantee a better result if the source, codec, or pipeline is already the limiting factor. Avoid repeated lossy re-encoding.
Your turn
Create a review copy and an intermediate-quality copy of the same sequence. Record their settings, size, and visible differences.
Knowledge check
What is the difference between container and codec?
The container alone determines image quality.
The container holds streams; the codec encodes their content.
They are always interchangeable terms.
Check your answer
The container holds streams; the codec encodes their content.
LESSON 15.02 · 35 MIN PRACTICE
Render ranges, presets, queues, and transparent output
The Deliver page renders what its settings specify, which may differ from what you intended. Range, active timeline, enabled streams, and destination deserve a deliberate final check.
Learning outcome Create a correctly scoped render job and verify alpha when required.
Work through it
Open Deliver and confirm the active timeline. Choose Entire Timeline or a deliberate In/Out range, then inspect the range markers and expected duration.
Set a clear filename and destination. Review video and audio export switches, frame rate, resolution, and single-clip versus individual-clip mode.
Add the job to the render queue and inspect the queued settings. If you change the timeline or settings afterward, verify the queued job reflects the intended state.
For transparent graphics, choose a supported format/codec combination with alpha export available. Render and reimport it over a contrasting background to verify actual transparency.
A black background in a player does not prove transparency. Verify the alpha channel by compositing the export over another image.
Your turn
Queue a full review render and a short test range with distinct names. Reopen both files and confirm duration, sound, and framing.
Knowledge check
How should an alpha export be checked?
Assume black pixels are transparent.
Reimport it and composite it over another background.
Rename .mp4 to .mov.
Check your answer
Reimport it and composite it over another background.
LESSON 15.03 · 40 MIN PRACTICE
Vertical, square, and multiple delivery versions
Different aspect ratios require editorial judgment. Cropping a horizontal image can remove context or subtitles. A good alternate version respects the new frame instead of blindly scaling the old one.
Learning outcome Adapt a film to another aspect ratio without losing important content.
Work through it
Duplicate the finished timeline for each output version and label it clearly. Set the intended dimensions and confirm that the original version remains available.
Review each shot’s framing. Reposition or scale deliberately and inspect moving subjects throughout the clip. Use automatic reframing only as a draft to review.
Adjust titles and subtitles for the new composition and actual viewing size. Check safe areas and avoid placing text where the intended platform overlays controls.
Export a short sample of each version and compare the storytelling. A different crop may require a different shot or slightly different timing.
A center crop can miss the subject entirely during movement. Do not approve a whole version from its opening frame.
Your turn
Deliver 16:9 and 9:16 versions of a 20-second sequence. Check every title, face, and moving subject in both outputs.
Knowledge check
What is the most important reframing check?
Check only the timeline’s first frame.
Increase saturation until the crop feels intentional.
Review each shot throughout its duration.
Check your answer
Review each shot throughout its duration.
LESSON 15.04 · 45 MIN PRACTICE
Quality control, color tags, and final handoff
Quality control is a repeatable inspection of the actual deliverables. It combines technical checks with uninterrupted viewing. A file can be technically valid and still contain an editorial mistake.
Learning outcome Deliver a checked file with a traceable version and clear specifications.
Work through it
Write a short checklist from the delivery specification: name, duration, resolution, frame rate, codec, audio channels, subtitles, and any required color metadata.
Watch the exported film from beginning to end without touching the timeline. Mark black gaps, flash frames, spelling errors, offline media, sync drift, and abrupt endings.
Inspect picture and sound in the intended playback environment. If color differs, investigate color management, tags, player behavior, and monitoring rather than immediately compensating the grade.
Package the final files with a plain-language delivery note describing versions and specifications. Keep a copy of the approved master and the project version that produced it.
Reviewing the timeline instead of the export can miss encoder, range, subtitle, and channel-mapping mistakes.
Your turn
Perform a full QC pass on your first film. Record every finding, fix it, render a new version, and recheck the corrected file.
Knowledge check
Which file should the final QC pass inspect?
Only a screenshot of the render settings.
Only the original camera clip.
The actual exported deliverable.
Check your answer
The actual exported deliverable.
MODULE 16 · ADVANCED
Professional project workflows
Collaborate, troubleshoot, archive, and build repeatable working habits.
LESSON 16.01 · 40 MIN PRACTICE
Collaboration, project libraries, and media paths
A shared project is not the same as shared media. Collaborators need compatible project access, consistent versions, and a reliable way to reach the source files.
Learning outcome Plan a collaboration that accounts for both project state and its dependencies.
Work through it
Define responsibilities for editor, colorist, and sound work. Agree on Resolve versions and project naming before exchanging active work.
Compare a local project library with a shared Project Server or Blackmagic Cloud workflow. Understand where the project lives and separately where the media lives.
Test a short shared project with two workstations if available. Verify media paths, proxies, audio, fonts, and plugins, then observe locking and update behavior.
Set a revision and communication convention. Before a major change, create a recoverable version and record what another collaborator must refresh or review.
Cloud project access does not guarantee the other person has the media, fonts, effects, or licenses needed to reproduce your timeline.
Your turn
Create a handoff checklist for a second workstation. If working alone, simulate the handoff by opening a copied project with a separate media folder.
Knowledge check
What must be shared or made accessible in addition to project data?
Nothing; a project always includes every asset.
Only the editor’s desktop wallpaper.
The required media and other project dependencies.
Check your answer
The required media and other project dependencies.
LESSON 16.02 · 35 MIN PRACTICE
Performance diagnosis and a calm troubleshooting method
Good troubleshooting changes one variable at a time. Separate source decoding, storage, effects, memory, and output problems so you can solve the actual bottleneck.
Learning outcome Isolate a performance problem using controlled comparisons.
Work through it
Reproduce the problem on a short section and note the conditions: clip type, timeline format, effects, and whether the issue appears in playback or only export.
Bypass expensive grades or Fusion effects, then test again. Compare original versus proxy playback and a lower viewer resolution to isolate processing versus decoding limits.
Check storage availability and free space. Verify that cache paths and media locations are reachable. Close unrelated heavy workloads and repeat the same test.
If a particular clip fails, test it in a minimal project. Save diagnostics and a clear reproduction note before seeking support; protect your working project and backups.
Deleting caches can be useful, but it does not repair every issue and may temporarily make playback slower while rebuilding. Do not delete original media as a performance fix.
Your turn
Create a deliberately demanding effect stack, then identify which change most improves playback. Record the evidence rather than just a list of guesses.
Knowledge check
What makes troubleshooting evidence useful?
A reproducible problem and one-variable comparisons.
Assuming the GPU is always responsible.
Changing every setting at once.
Check your answer
A reproducible problem and one-variable comparisons.
LESSON 16.03 · 45 MIN PRACTICE
Archive, restore, and long-term project health
An archive is only useful if it can be restored. A reliable package includes the necessary project data and media, with known dependencies and a clear record of the delivered version.
Learning outcome Restore an archived project and explain what the package contains.
Work through it
Choose the approved project version and export its project data. Create a project archive or an explicitly organized media copy using the available archive and media-management options.
Document external dependencies: fonts, plugins, LUTs, graphics, subtitles, and licensed assets. Some dependencies may not be included automatically in an archive.
Copy the package to a second storage location. Open the archive or restored project independently and verify that used media resolves without relying on the original paths.
Render a short representative section from the restored project and compare it with the approved master. Record the software version and archive contents in a manifest.
A folder called Final is not evidence of recoverability. A backup that has never been restored remains an untested assumption.
Your turn
Archive your course film and perform a restore test. Your manifest should identify the project, media, dependencies, final masters, and date.
Knowledge check
What is the decisive test of an archive?
It is stored beside the only original media.
Its folder name includes “backup”.
Restoring and validating it independently.
Check your answer
Restoring and validating it independently.
LESSON 16.04 · 45 MIN PRACTICE
Review cycles, portfolio judgment, and deliberate practice
Expertise grows through making work, finding weaknesses, and correcting them. Finishing a course is useful, but repeated projects and critical review turn procedures into judgment.
Learning outcome Evaluate your work against clear criteria and plan the next practice cycle.
Work through it
Create a review copy with a clear version label. Ask for comments tied to specific times and distinguish story issues from technical polish.
Collect notes in one place. Resolve contradictory requests before changing the edit, and preserve the last approved version before major revisions.
Choose one craft weakness per revision: pacing, shot matching, dialogue clarity, or compositing integration. Make a deliberate change and compare it with the previous version.
Write a short retrospective after delivery: what worked, what failed, and what you will test next. Use that reflection to choose the next practice project.
Adding more effects is not the same as improving the film. Each revision should solve a recognizable problem or strengthen an intentional choice.
Your turn
Revisit your first three-shot film after completing the course. Create a second version and document five specific improvements with before/after evidence.
Knowledge check
What best demonstrates growing expertise?
Marking lessons complete without practicing.
Repeated work with specific, observable improvements.
The number of effects on a clip.
Check your answer
Repeated work with specific, observable improvements.
MODULE 17 · ADVANCED
New tools & workflow automation
Evaluate version changes and make repetitive work more reliable.
LESSON 17.01 · 30 MIN PRACTICE
The 21.1 and 21.1.1 workflow changes
Maintenance releases can change everyday interactions without replacing your whole workflow. Test new behavior on a duplicate project before introducing it into an active production.
Learning outcome Evaluate a release change with a repeatable test rather than assuming compatibility.
Work through it
Check the installed version in About DaVinci Resolve. Record it in your project notes and compare it with the version your collaborators use.
In 21.1.1, test the updated trim editor with an audio-only clip and multiple selected edit points. Observe the viewer’s edit-side indication and listen to mouse-trim audio previews.
Apply the same Fusion effect twice to a test clip. Inspect the separate effect instances in the Inspector and verify that changing one leaves the other’s settings independent.
Try the relevant 21.1 archive, photo, or multicam improvements in a short duplicate project. Keep a record of differences that affect your established delivery process.
Updating halfway through a production can introduce compatibility differences. Preserve backups and confirm collaborators and dependencies before moving the working project.
Your turn
Create a small release-validation checklist and record the result of two features on your installed build. If your build is older, identify the missing behavior explicitly.
Knowledge check
Where should you first test a new release workflow?
By overwriting every archive.
In a recoverable duplicate or small test project.
Only in the sole copy of an active production.
Check your answer
In a recoverable duplicate or small test project.
LESSON 17.02 · 40 MIN PRACTICE
MultiMaster trims, grade versions, and controlled variants
Multiple output versions need a clear relationship to the main grade. Separate the creative base from output-specific adjustments so a late change does not become an inconsistent collection of copies.
Learning outcome Maintain traceable grade variants and output-specific adjustments.
Work through it
Create a well-labeled base grade and save a version before experimentation. Decide which changes are creative and which compensate for a particular output target.
Inspect the MultiMaster and trim controls available in your Studio build. In 21.1, individual MultiMaster trims provide additional output-specific control; test on a short sequence first.
Change one trim and compare the relevant outputs. Confirm that the base and other intended versions remain consistent with your design.
Render representative samples of every required output and review them through their appropriate monitoring paths. Record which version and trim produced each deliverable.
A version name is not a substitute for checking the active grade and output path. Small context mistakes can affect many shots.
Your turn
Prepare two clearly labeled output variants of a short scene. Explain which decisions are shared and which belong only to a particular output.
Knowledge check
Why separate a base grade from output trims?
To avoid checking any exports.
To force all displays to look identical without calibration.
To preserve shared intent while adapting specific outputs.
Check your answer
To preserve shared intent while adapting specific outputs.
LESSON 17.03 · 45 MIN PRACTICE
Scripting: inspect safely before automating
Resolve scripting can reduce repetitive work, but scripts operate on real project state. Start with read-only inspection, use the API documentation installed with your exact build, and test on disposable projects.
Learning outcome Design a cautious scripting workflow with explicit inputs and observable results.
Work through it
Locate the scripting documentation and sample scripts installed with Resolve. Identify the supported Python or Lua environment and the access settings required by your Studio build.
Begin with the in-app console and a read-only query for the current project or timeline using the documented API. Confirm what object was returned before calling methods on it.
Write down a narrow automation goal, such as reporting timeline names or render-job status. Validate inputs and handle the case where no project or timeline is open.
Only after read-only inspection works, test a small reversible change on a duplicate project. Log affected items and compare the result with doing the same action manually.
The 21.1 release expands scripting APIs and console support. This lesson teaches the workflow rather than assuming method names are stable across every installation. Keep scripts small, document their required version, and preserve the original project before mutations.
A mistake to avoid
An API example for another release may use unavailable methods. Do not run a bulk rename, delete, or render action before verifying its target set.
Your turn
Design a read-only project audit that reports timeline names, frame rates, and render destinations supported by the installed API. Record any unavailable fields rather than inventing them.
Knowledge check
What is the best first scripting task?
A read-only inspection with a clearly verified target.
Deleting all unused media automatically.
Running an unreviewed script against every project.
Check your answer
A read-only inspection with a clearly verified target.
LESSON 17.04 · 35 MIN PRACTICE
AI assistant integration and human approval points
Assistant integration can help coordinate actions, but permissions, context, and verification still matter. Treat a proposed action differently from a completed, checked change.
Learning outcome Define and verify an assistant-driven workflow with clear boundaries.
Work through it
Inspect the AI assistant integration options available in your Studio installation. Understand what data and project actions the connection can access before enabling it.
Start with a narrow read-only request about a disposable project. Check that the assistant identifies the correct project and timeline and accurately describes its contents.
For a reversible edit, state the exact scope and expected result. Review the proposed operation, execute it only in the test project, and compare the actual timeline afterward.
Require a deliberate review before destructive media actions, overwriting deliverables, or publishing material. Keep a human-readable log of what changed and how to restore it.
Fluent explanations do not prove that an assistant changed the correct project. Read back the actual state and inspect the resulting media.
Your turn
Write a precise automation brief for creating a review export without overwriting an existing master. Include target timeline, range, destination, naming, and verification criteria.
Knowledge check
What proves an assistant task succeeded?
Its explanation uses technical vocabulary.
The actual project or output matches the specified result.
The assistant says “done” without evidence.
Check your answer
The actual project or output matches the specified result.
Six portfolio projects
A small story, well told
Create a 30–45 second film showing a simple action from beginning to end. Film a cup of tea, a short walk, or a familiar routine. Use at least six original shots. The supplied motion study clips can be used for a technical editing rehearsal, but film real coverage for the storytelling assessment.
Deliverables
A clearly named project and organized media bins.
A finished 1080p review movie with a title and intentional sound.
A short note explaining three editing decisions.
Review criteria
The opening establishes context and the ending feels intentional.
Every cut adds information or changes attention for a reason.
There are no unintended gaps, flash frames, or clipped titles.
The exported movie plays correctly from start to finish.
The interview, made human
Record 60–90 seconds of someone explaining a hobby, or record yourself. Edit it to 30 seconds without changing the speaker’s meaning. Cover at least one picture edit with relevant B-roll and use a J-cut or L-cut.
Deliverables
An organized interview timeline with labeled dialogue and B-roll.
An accurate subtitle file and a captioned review movie.
A dialogue-only stem aligned to the full mix.
Review criteria
All words and subtitles match the recording.
Room tone and fades make edits unobtrusive.
Dialogue remains intelligible under music at low listening volume.
The shortened story preserves the original meaning.
One scene, one visual language
Grade five shots from the same scene. Start with a documented color pipeline, balance each shot, and then create a shared look. Use at least one tracked secondary correction and keep before/after evidence.
Deliverables
A pipeline note stating input, working, and output assumptions.
A graded scene plus an ungraded or baseline comparison.
A labeled node structure and three review stills.
Review criteria
Exposure and color remain coherent across cuts.
Skin and important neutral objects retain believable relationships.
Tracked corrections do not drift or reveal hard edges.
The final codec does not introduce unacceptable banding or texture loss.
A graphic that belongs in the shot
Create an original title sequence or a screen replacement in Fusion. Use a deliberate node structure, a controlled animation, and clean compositing. For a replacement, shoot a flat sign or monitor with visible tracking detail.
Deliverables
A five-to-ten-second finished composite.
A reusable graphic or a documented tracking setup.
A still showing the node flow and a short integration review.
Review criteria
Text is readable at the intended viewing size.
Edges, motion, and perspective remain stable throughout the shot.
The graphic matches the plate’s sharpness, light, and texture.
The composition renders without missing dependencies.
A photographic mini-series
Choose six original photographs and finish a three-image series in the Photo page. Use a consistent look, individual corrections, and intentional crops. The supplied stills support technical practice; use your own photographs for the final series.
Deliverables
Three screen-ready image exports.
A simple contact sheet or organized set for review.
Export notes with dimensions, format, and color assumptions.
Review criteria
The images form a visually coherent series.
Each crop has a clear subject and no accidental distractions.
Local corrections remain invisible at full viewing size.
Exported dimensions and orientation match the brief.
The complete finishing challenge
Finish a 60–90 second film using your own footage. Include a structured edit, an original Fusion graphic, a coherent grade, a dialogue/music/effects mix, accurate captions, and two aspect ratios. Treat this as a client delivery.
Deliverables
16:9 and 9:16 review masters with an explicit technical specification.
Aligned dialogue, music, and effects stems, plus subtitles.
A restorable project archive and dependency manifest.
A QC report, revision log, and a brief self-review.
Review criteria
Every output has been watched and checked independently.
Reframing and captions work throughout both aspect ratios.
The mix meets the declared loudness and peak specification.
The archive restores with all required media available.
Revisions demonstrate specific improvements over the first cut.