LESSON 01.04 · 35 MIN PRACTICE
Build and export your first small film
A first finished edit makes the rest of the course concrete. You will assemble three shots, adjust their length, add a simple title, and render a review copy.
Select›Assemble›Trim›Title›Render›Check
Conceptual workflow · read from left to right
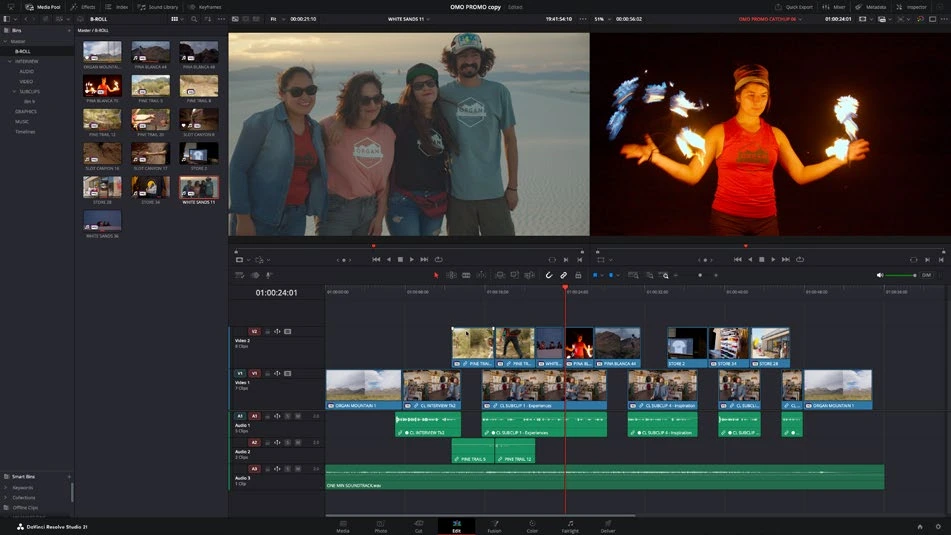
ACTUAL RESOLVE INTERFACEView full size ↗
Work through it
- Import three clips. Open each in the source viewer and press I and O around a usable section. Add the selections to your timeline in an order that establishes a place, shows an action, and reveals a detail.
- Use Selection mode to drag the ends of each clip. Keep roughly 3–5 seconds per shot. Play the whole sequence and remove any empty gaps you did not intend.
- Open Effects on Edit and add a basic Text title above the opening shot. Change its text in the Inspector. Keep it inside the viewer’s title-safe guides and readable against the picture.
- Open Deliver. Choose a supported H.264 review preset or Custom Export, confirm resolution, frame rate, audio, filename, and destination, then add the job to the render queue and render it.
Your turn
Watch the exported file in a separate player from start to finish. Check the first and last frames, the title, and whether audio is present. Keep this first version to compare with your later work.
QUICK KNOWLEDGE CHECK
What is the final step after a successful render?
Your notes
Write down what worked, what surprised you, and what to try next. Saved on this device.
Original practical lesson · Open the in-house resource shelf for practice files and definitions. Completion records your self-assessment, not certification.