LESSON 04.03 · 25 MIN PRACTICE
J-cuts, L-cuts, and invisible transitions
Sound and picture do not have to change together. A J-cut introduces incoming audio before its image. An L-cut allows outgoing sound to continue over the next image.
Incoming sound begins›Picture changes›Scene continues
Conceptual workflow · read from left to right
ACTUAL RESOLVE INTERFACEView full size ↗
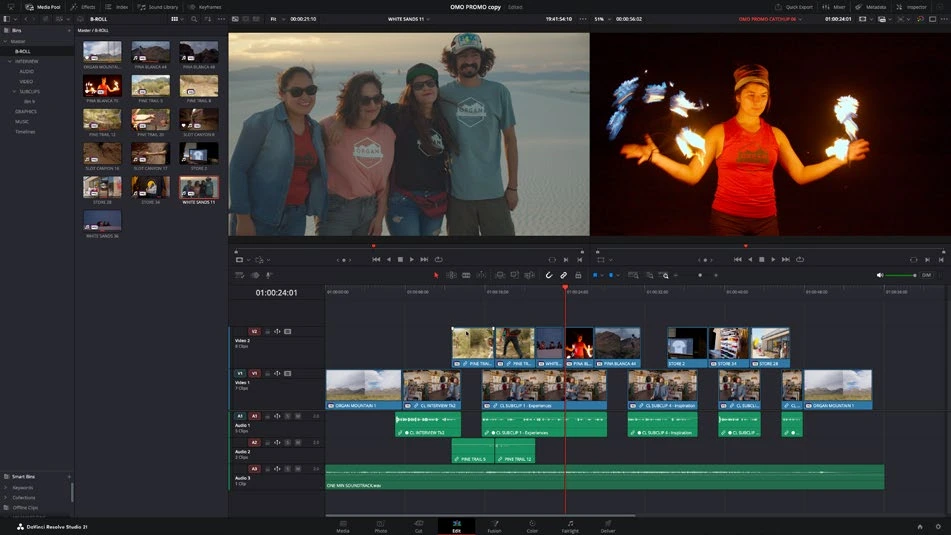
Work through it
- Place two dialogue or location clips in sequence. Listen for a natural phrase boundary and make an initial picture cut.
- Temporarily select audio independently and extend the incoming sound earlier for a J-cut. Preserve useful room tone under the overlap.
- For an L-cut, hold outgoing dialogue while cutting to a reaction or relevant B-roll. Check that the listener understands who is speaking.
- Add short audio fades only where needed to avoid clicks. Compare the edit with and without a visual dissolve; a clean cut often communicates more clearly.
Your turn
Build a 15-second scene with one J-cut and one L-cut. Listen with your eyes closed, then watch without sound. Both passes should feel intentional.
QUICK KNOWLEDGE CHECK
What defines a J-cut?
Your notes
Write down what worked, what surprised you, and what to try next. Saved on this device.
Original practical lesson · Open the in-house resource shelf for practice files and definitions. Completion records your self-assessment, not certification.