← All 100 how-to guidesGUIDE 002 / 100
SETUP & MEDIA
How to organize footage with bins
DaVinci Resolve Studio 21.1 · Original practical guide
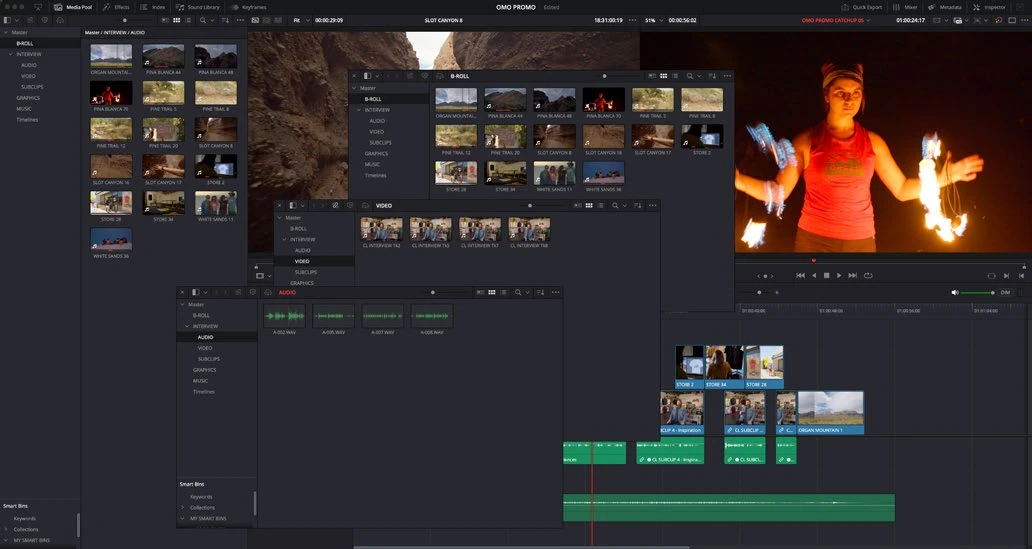
Bins organize references inside a project. A simple structure for camera, dialogue, music, graphics, and timelines makes a growing edit easier to navigate.
ACTUAL RESOLVE INTERFACEView full size ↗
Step by step
- In the Media Pool, right-click the bin list and create a new bin. Give it a useful name such as Camera A.
- Create separate bins for sound, graphics, and timelines, then drag existing Media Pool clips into the appropriate bins.
- Switch to list view when you need to compare metadata such as duration or frame rate. Rename display names only when the original filename remains traceable.
- Open a bin, preview several sources, and confirm that each item is where another editor would expect to find it.
Check your result
You can find a particular take quickly without searching every clip in the project.
Technical reference: DaVinci Resolve 21.1 Reference Manual, Blackmagic Design, September 2026. Screenshot page numbers refer to that manual. Independently written guidance; specific controls may vary by platform and build. Authorship & image credits.