← All 100 how-to guidesGUIDE 026 / 100
FRAMING & MOTION
How to create a speed ramp
DaVinci Resolve Studio 21.1 · Original practical guide
A speed ramp changes playback speed within a clip. Plan the action moment first so the acceleration serves a recognizable beat rather than feeling arbitrary.
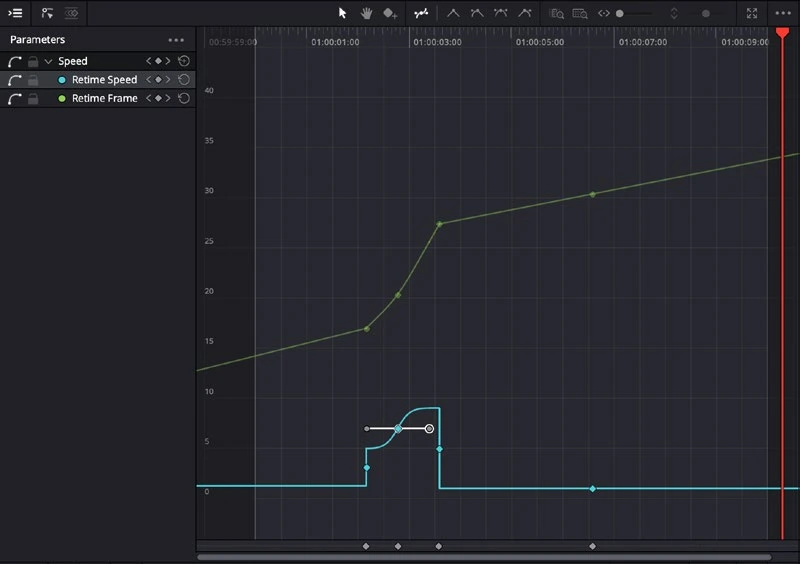
ACTUAL RESOLVE INTERFACEView full size ↗
Step by step
- On Edit, right-click the clip and enable Retime Controls. Place the playhead where the first speed change should occur.
- Use the retime segment menu to add a speed point. Add another point to bracket the action that should play at a different speed.
- Set the speed of each segment and inspect how the clip duration changes. Leave enough source frames beyond the visible range.
- Open Retime Curve, display the speed curve, and soften the change where appropriate. Preview or cache the result, then inspect a rendered sample for interpolation errors.
Check your result
The speed transition lands on the intended action and has no accidental jump or frozen section.
Technical reference: DaVinci Resolve 21.1 Reference Manual, Blackmagic Design, September 2026. Screenshot page numbers refer to that manual. Independently written guidance; specific controls may vary by platform and build. Authorship & image credits.