← All 100 how-to guidesGUIDE 027 / 100
FRAMING & MOTION
How to reverse a video clip
DaVinci Resolve Studio 21.1 · Original practical guide
Reverse playback can create a reveal or make an action run backward. Check sound separately because reversed dialogue is rarely useful.
ACTUAL RESOLVE INTERFACEView full size ↗
Step by step
- Duplicate the clip or timeline section so you can compare the original action with the reversed version.
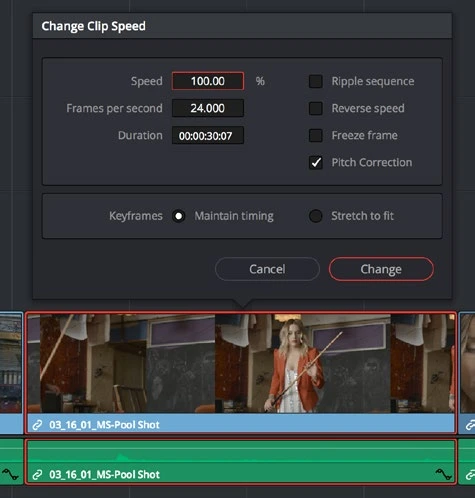
- Right-click the video clip and open Change Clip Speed. Enable Reverse Speed, then confirm the change.
- Review the clip’s new beginning and ending. Adjust trims or neighboring cuts so the reversed action connects cleanly.
- Listen to linked audio and decide whether to mute, replace, or separate it. Render a short check if the source or effects make playback unreliable.
Check your result
The action runs backward at the intended speed and the audio choice is deliberate.
Technical reference: DaVinci Resolve 21.1 Reference Manual, Blackmagic Design, September 2026. Screenshot page numbers refer to that manual. Independently written guidance; specific controls may vary by platform and build. Authorship & image credits.