← All 100 how-to guidesGUIDE 025 / 100
FRAMING & MOTION
How to make smooth slow motion
DaVinci Resolve Studio 21.1 · Original practical guide
Good slow motion starts with enough recorded frames. Optical Flow can synthesize intermediate frames, but complex edges and crossing objects can reveal artifacts.
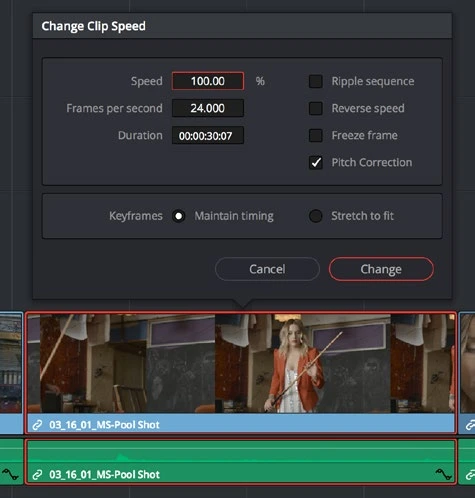
ACTUAL RESOLVE INTERFACEView full size ↗
Step by step
- Select the clip, open Change Clip Speed, and lower its speed. For 60 fps footage on a 30 fps timeline, 50% uses the recorded frames evenly.
- Decide whether the timeline should ripple when the clip becomes longer. Check that nearby audio and titles move as intended.
- In the Inspector’s Retime and Scaling controls, choose the retime processing method. Try frame blending or Optical Flow only when needed.
- Render a short test and inspect hands, wheels, water, and overlapping objects frame by frame. Compare against simpler processing before keeping it.
Check your result
Motion is smooth enough for the shot and the longer duration fits the edit without sync damage.
Technical reference: DaVinci Resolve 21.1 Reference Manual, Blackmagic Design, September 2026. Screenshot page numbers refer to that manual. Independently written guidance; specific controls may vary by platform and build. Authorship & image credits.