← All 100 how-to guidesGUIDE 019 / 100
EDITING ESSENTIALS
How to add and manage timeline tracks
DaVinci Resolve Studio 21.1 · Original practical guide
Tracks separate picture layers and sound roles. Higher video tracks usually cover lower tracks where their pixels are opaque; audio tracks are mixed through their routing.
ACTUAL RESOLVE INTERFACEView full size ↗
Step by step
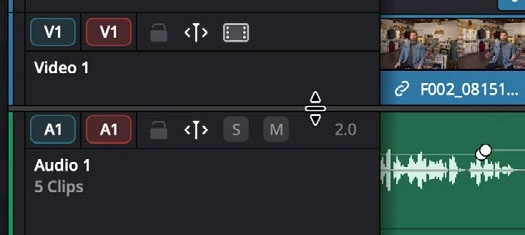
- Right-click a track header on Edit and use Add Track or Add Tracks to create the required video or audio track.
- For audio, choose the correct channel format, such as mono for a single microphone or stereo for stereo music.
- Rename tracks by role and adjust their height so clips and waveforms are visible. Place related material consistently.
- Use track lock, mute, solo, or video enable controls deliberately, then restore the intended playback state before exporting.
Check your result
The track layout is easy to read and every intended picture layer and sound role reaches the output.
Technical reference: DaVinci Resolve 21.1 Reference Manual, Blackmagic Design, September 2026. Screenshot page numbers refer to that manual. Independently written guidance; specific controls may vary by platform and build. Authorship & image credits.