← All 100 how-to guidesGUIDE 020 / 100
EDITING ESSENTIALS
How to make a J-cut or L-cut
DaVinci Resolve Studio 21.1 · Original practical guide
A split edit lets sound lead or continue beyond a picture cut. It can make dialogue transitions feel natural without forcing picture and sound to change together.
ACTUAL RESOLVE INTERFACEView full size ↗
Step by step
- Arrange two connected shots with enough extra audio on both sides of the cut. Duplicate the timeline first.
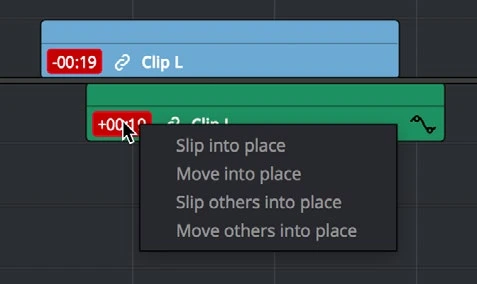
- Temporarily disable Linked Selection, or select the audio edit separately, so trimming sound does not also trim picture.
- For a J-cut, bring the next shot’s sound in before its picture. For an L-cut, extend the outgoing sound under the next picture.
- Use appropriate audio tracks and short fades where needed. Re-enable Linked Selection and listen with your eyes closed before reviewing picture.
Check your result
The overlap supports the story and there are no repeated syllables, abrupt ambience changes, or sync errors.
Technical reference: DaVinci Resolve 21.1 Reference Manual, Blackmagic Design, September 2026. Screenshot page numbers refer to that manual. Independently written guidance; specific controls may vary by platform and build. Authorship & image credits.