← All 100 how-to guidesGUIDE 016 / 100
EDITING ESSENTIALS
How to add markers and timeline notes
DaVinci Resolve Studio 21.1 · Original practical guide
Markers make review notes findable. A clip marker follows its clip; a timeline marker belongs to a position in the sequence.
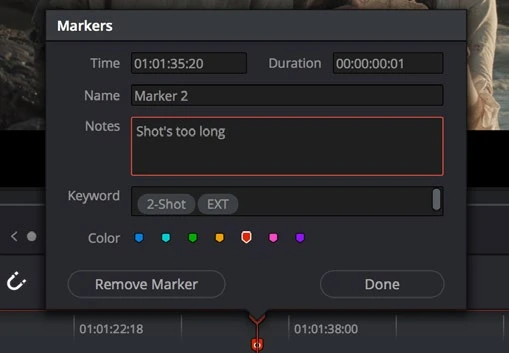
ACTUAL RESOLVE INTERFACEView full size ↗
Step by step
- Place the playhead at the frame you want to discuss. Deselect clips when the note should belong to the timeline.
- Press M to add a marker. Open its dialog to enter a short title, useful note, and a meaningful color.
- For a note that must travel with a shot, select the clip before adding its marker. Move the clip in a duplicate timeline to confirm the attachment.
- Use the Edit Index to review markers and navigate among notes. Remove or update resolved notes so the list remains actionable.
Check your result
Each marker brings you to the correct frame and clearly describes what needs attention.
← PREVIOUS GUIDEInsert a clip without overwriting the editNEXT GUIDE →Duplicate a timeline before a revision
Technical reference: DaVinci Resolve 21.1 Reference Manual, Blackmagic Design, September 2026. Screenshot page numbers refer to that manual. Independently written guidance; specific controls may vary by platform and build. Authorship & image credits.