← All 100 how-to guidesGUIDE 082 / 100
EXPORT & DELIVERY
How to export a video for YouTube
DaVinci Resolve Studio 21.1 · Original practical guide
A good upload starts with a clean master at the intended frame rate and resolution. Platform processing may create additional versions, so keep your original export.
ACTUAL RESOLVE INTERFACEView full size ↗
Step by step
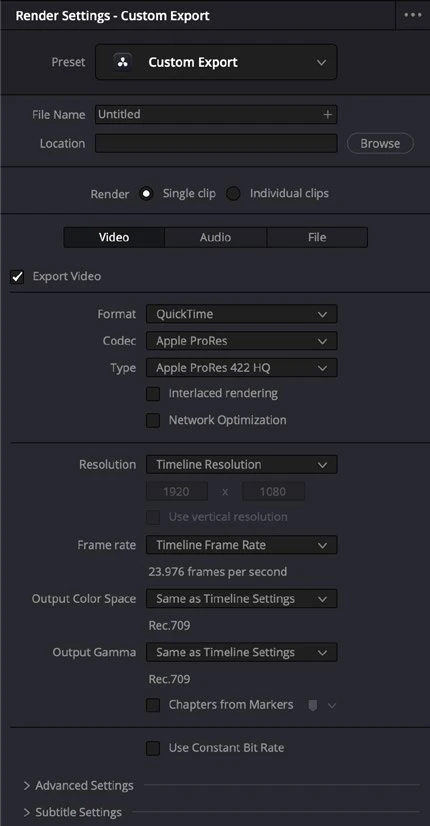
- On Deliver, choose a suitable YouTube preset or configure a Custom Export matching your timeline and upload plan.
- Confirm resolution, frame rate, codec, and audio bus. Use a bitrate or quality setting appropriate to the image complexity rather than the smallest possible file.
- Choose whether captions should be burned in or supplied separately. Keep title graphics legible at smaller playback sizes.
- Render locally and review the whole file before uploading. Preserve the approved master and caption file with a clear version name.
Check your result
The local upload master looks and sounds correct before any platform recompression happens.
Technical reference: DaVinci Resolve 21.1 Reference Manual, Blackmagic Design, September 2026. Screenshot page numbers refer to that manual. Independently written guidance; specific controls may vary by platform and build. Authorship & image credits.