← All 100 how-to guidesGUIDE 043 / 100
AUDIO & DIALOGUE
How to fade audio in and out
DaVinci Resolve Studio 21.1 · Original practical guide
Audio fades prevent abrupt starts, clicks, and rough transitions. A fade should follow the sound’s purpose rather than use the same duration on every clip.
ACTUAL RESOLVE INTERFACEView full size ↗
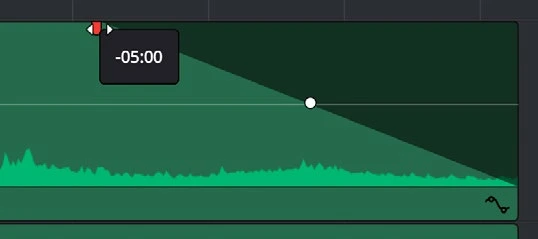
Step by step
- Expand the audio track enough to see its waveform and the upper corners of the clip.
- Drag the fade handle at the clip’s start inward to create a fade-in. Use a short fade for a click and a longer one for atmosphere or music.
- Drag the end handle inward for a fade-out. Adjust the fade shape if the level change sounds too abrupt or too slow.
- Listen across both boundaries in context and check that speech consonants, breaths, and musical endings are not unintentionally removed.
Check your result
The clip enters and leaves cleanly without clicks, chopped words, or an unnatural drop in ambience.
Technical reference: DaVinci Resolve 21.1 Reference Manual, Blackmagic Design, September 2026. Screenshot page numbers refer to that manual. Independently written guidance; specific controls may vary by platform and build. Authorship & image credits.