← All 100 how-to guidesGUIDE 052 / 100
COLOR FOUNDATIONS
How to fix white balance and a color cast
DaVinci Resolve Studio 21.1 · Original practical guide
White balance corrects an unwanted overall color bias. A genuinely neutral reference helps, but lighting can be deliberately warm, cool, or mixed.
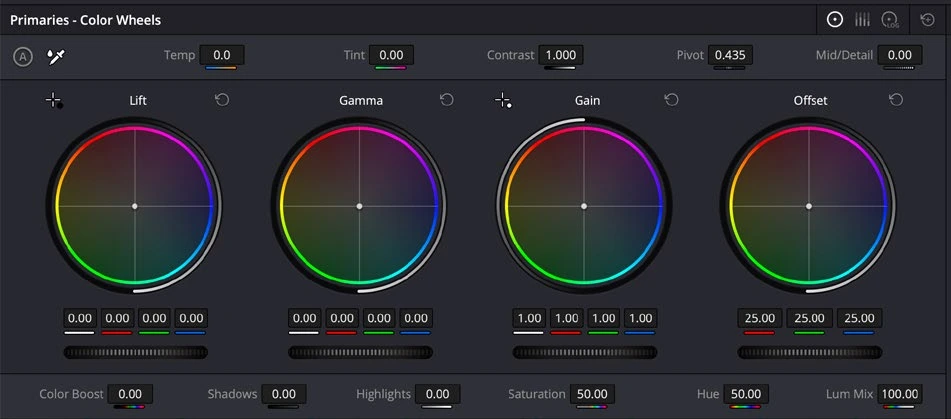
ACTUAL RESOLVE INTERFACEView full size ↗
Step by step
- Confirm the input color interpretation and choose a frame containing a useful neutral object under the subject’s lighting.
- Use Temperature and Tint in the Primaries controls, or camera RAW controls for supported RAW sources, to reduce the unwanted cast.
- Compare neutral areas in the RGB parade and inspect skin or another familiar material. Treat an eyedropper result as a starting point.
- Check the full shot and neighboring angles. Preserve intentional colored light rather than forcing every object to neutral gray.
Check your result
Neutral objects are plausible and the subject looks consistent with the scene’s intended lighting.
← PREVIOUS GUIDECorrect exposure with the primary controlsNEXT GUIDE →Adjust contrast without crushing detail
Technical reference: DaVinci Resolve 21.1 Reference Manual, Blackmagic Design, September 2026. Screenshot page numbers refer to that manual. Independently written guidance; specific controls may vary by platform and build. Authorship & image credits.