← All 100 how-to guidesGUIDE 057 / 100
COLOR FOUNDATIONS
How to set up color management for log footage
DaVinci Resolve Studio 21.1 · Original practical guide
Color management separates source interpretation from the working space and display output. It makes mixed cameras easier to handle when each input is identified correctly.
ACTUAL RESOLVE INTERFACEView full size ↗
Step by step
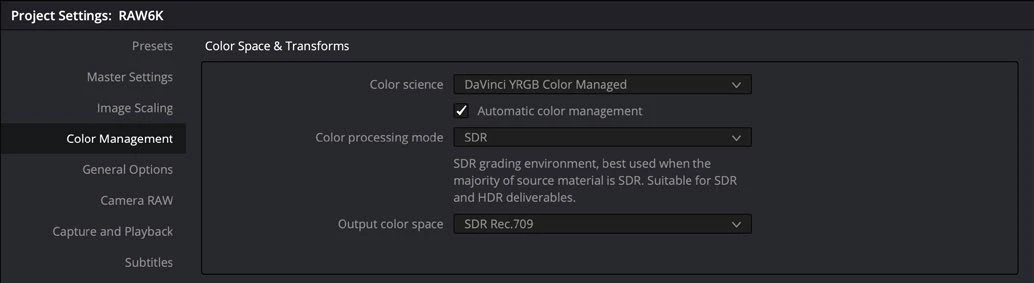
- Open Project Settings > Color Management and choose DaVinci YRGB Color Managed for a managed workflow.
- Use a suitable preset or custom settings for the intended input, working, and output pipeline. For an SDR project, explicitly choose the intended SDR output.
- Check each camera clip’s input color space. Assign the correct camera gamut and log curve where metadata is missing or wrong.
- Remove redundant conversion LUTs or transforms, then balance a representative shot and export a short reference for comparison.
Check your result
Log sources display with sensible contrast and different cameras respond consistently within the chosen pipeline.
Technical reference: DaVinci Resolve 21.1 Reference Manual, Blackmagic Design, September 2026. Screenshot page numbers refer to that manual. Independently written guidance; specific controls may vary by platform and build. Authorship & image credits.