← All 100 how-to guidesGUIDE 051 / 100
COLOR FOUNDATIONS
How to correct exposure with the primary controls
DaVinci Resolve Studio 21.1 · Original practical guide
Exposure correction establishes a useful tonal foundation. Judge the subject and scopes together; forcing every shot to fill the entire signal range can destroy its intended mood.
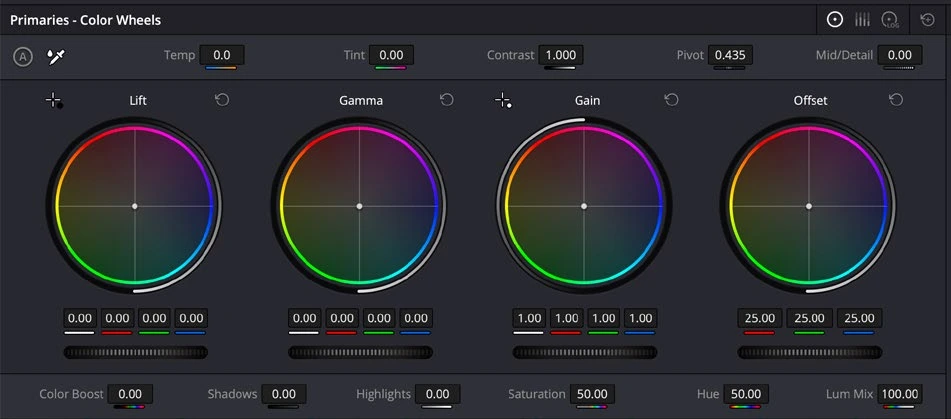
ACTUAL RESOLVE INTERFACEView full size ↗
Step by step
- On Color, select a representative frame and open the waveform scope alongside the Primaries controls.
- Use a broad adjustment such as Offset for an overall shift, then refine shadows, midtones, and highlights with the appropriate controls.
- Watch important highlight texture and deep-shadow detail while comparing the original and corrected image.
- Play the shot and review adjacent cuts. Reduce the correction if a changing light source or bright object clips during another part of the take.
Check your result
The important subject is readable and the intended highlight and shadow detail remain intact.
← PREVIOUS GUIDERecord a voiceover directly in ResolveNEXT GUIDE →Fix white balance and a color cast
Technical reference: DaVinci Resolve 21.1 Reference Manual, Blackmagic Design, September 2026. Screenshot page numbers refer to that manual. Independently written guidance; specific controls may vary by platform and build. Authorship & image credits.