← All 100 how-to guidesGUIDE 066 / 100
ADVANCED COLOR · STUDIO REQUIRED
How to reduce noise in low-light footage
DaVinci Resolve Studio 21.1 · Original practical guide
Noise reduction can improve a shot, but too much processing removes texture or produces motion trails. Judge a moving, full-resolution sample instead of a paused thumbnail.
ACTUAL RESOLVE INTERFACEView full size ↗
Step by step
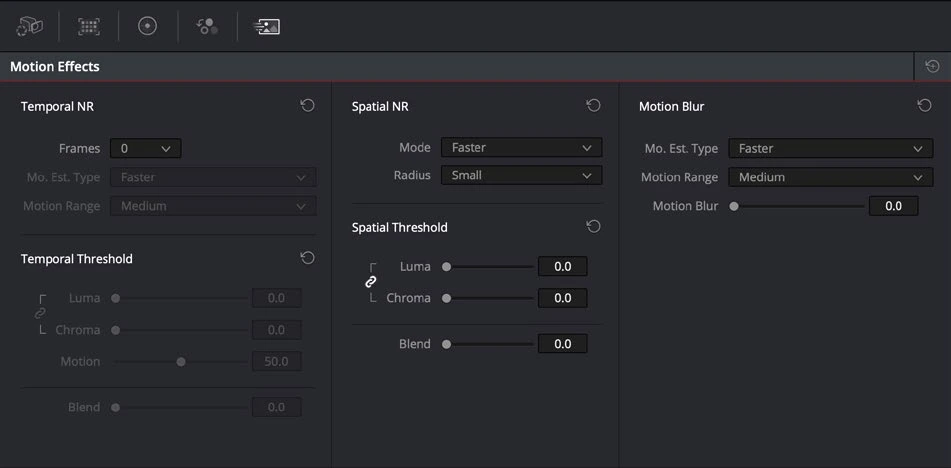
- On Color, use a dedicated node early in the correction chain and open Motion Effects noise reduction controls.
- Start with restrained temporal reduction on a representative moving section. Adjust luminance and chroma treatment according to the visible noise.
- Add modest spatial reduction only if needed. Compare fine texture, faces, and shadow motion with the node bypassed.
- Cache or render a short section and inspect for trails, smearing, and plastic skin before applying the treatment to other shots.
Check your result
Noise is less distracting while important texture and moving edges remain believable.
Technical reference: DaVinci Resolve 21.1 Reference Manual, Blackmagic Design, September 2026. Screenshot page numbers refer to that manual. Independently written guidance; specific controls may vary by platform and build. Authorship & image credits.